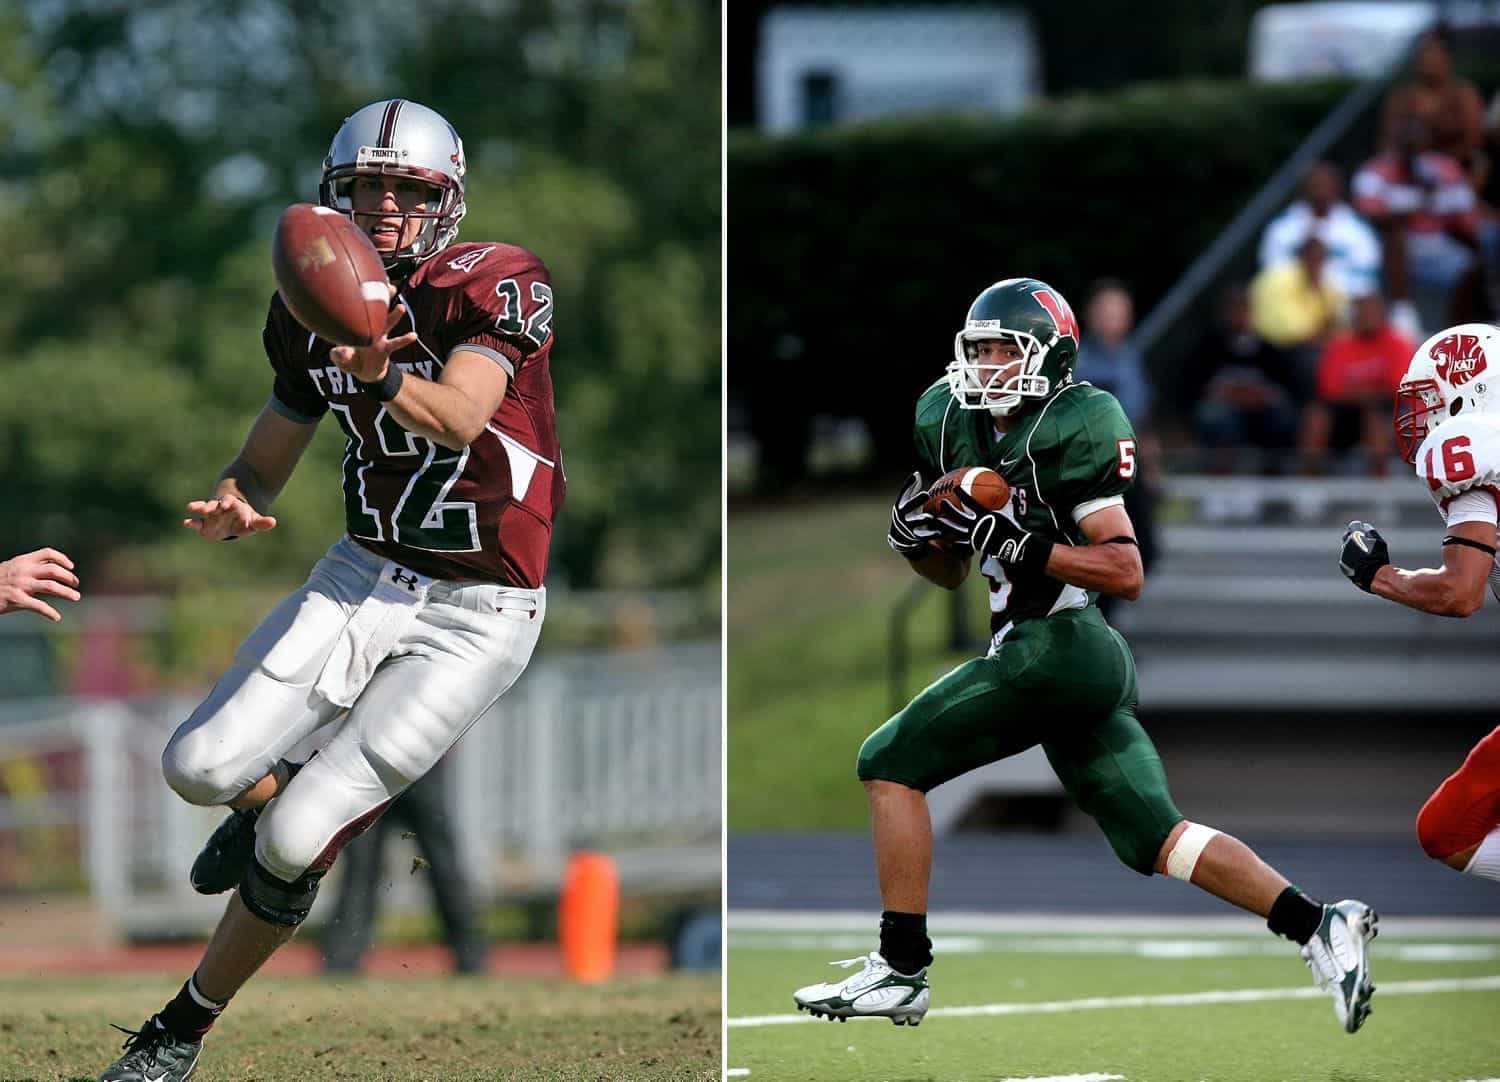
Ready to delve into the fast-paced world of sports photography? Here’s everything you need to know about making great sports images!
Over the past 20 years of doing photography, I’ve gotten to photograph all different types of things, but one of my favorites is sports. With sports photography, you get to watch the game and be part of the action!
What I quickly learned is that photographing sports is very different from other subject matter, and each sport is unique. There are lots of things to learn and consider, so let’s look at how to shoot sports photography.
What is Sports Photography?
Sports photography is simply the act of photographing a sports competition as it is happening. With that said, I wouldn’t consider team portraits or individual portraits as part of sports photography.
Some will argue about what counts as a sport
For example, I’ve had people tell me that “marching band is a sport” because it’s a physical competition, while others will say that golf or bowling “aren’t really sports.” I’ll let you decide what is or isn’t a sport. Either way, these sports photography tips can be applied to almost any action-packed situation.
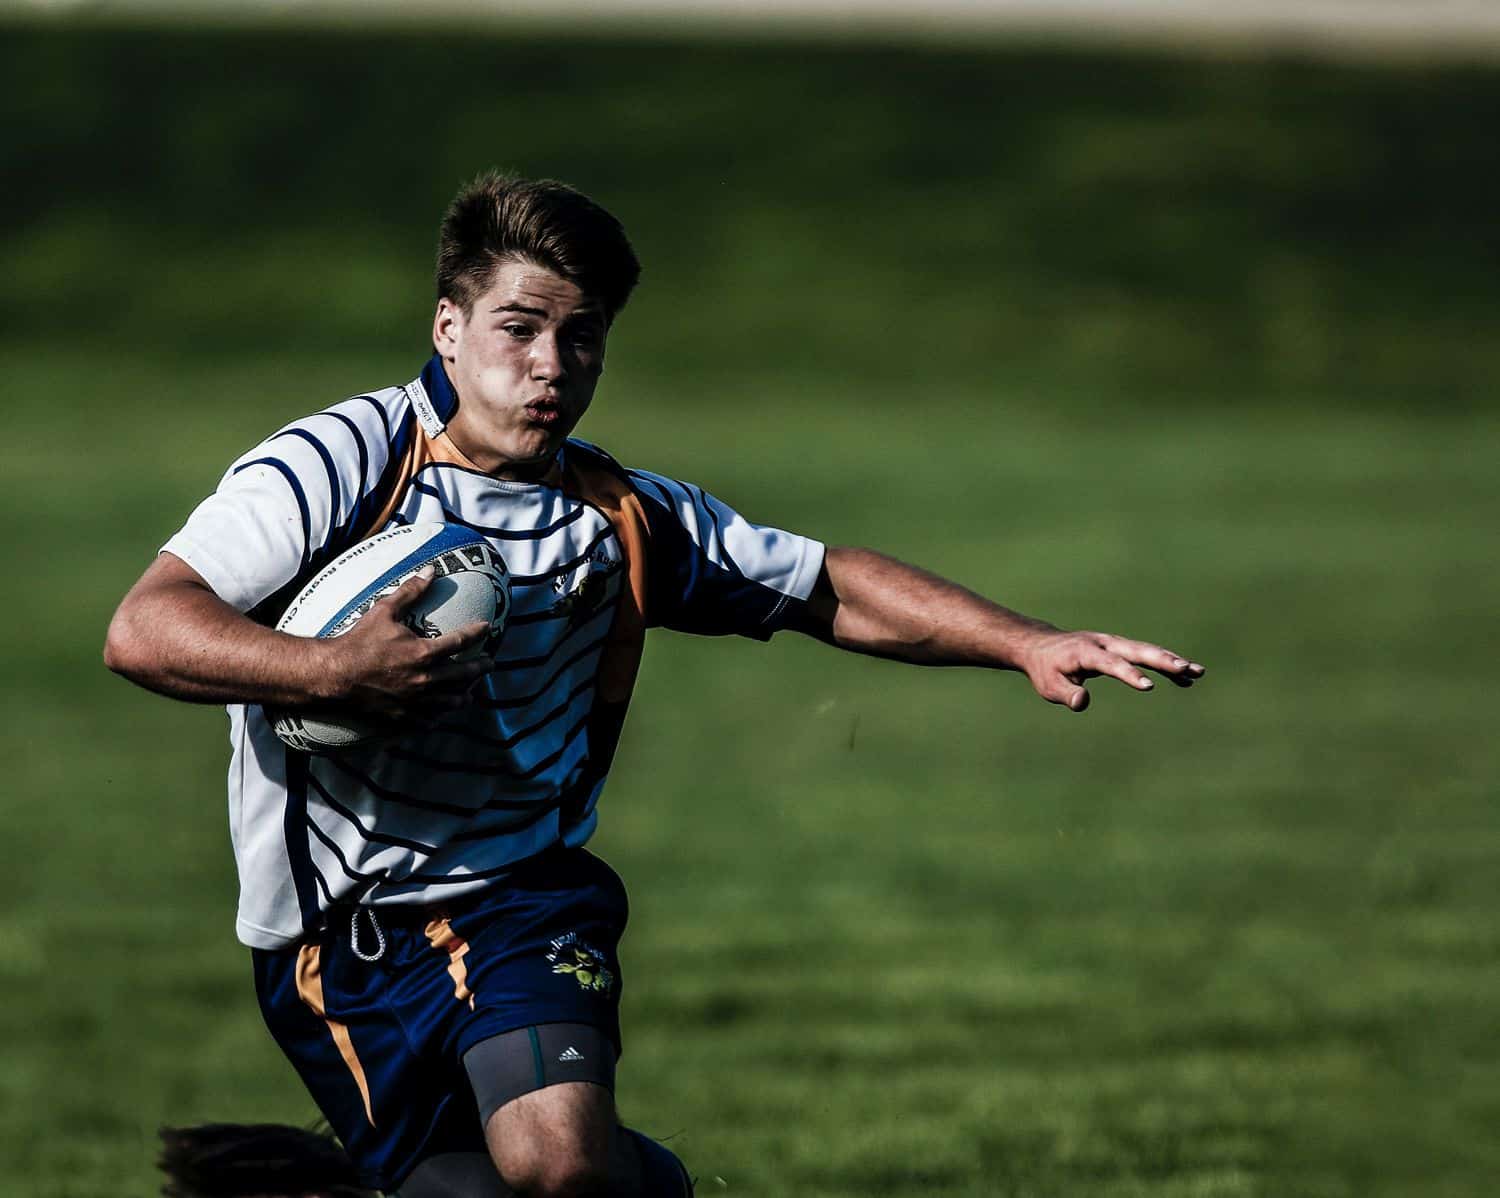
Keith Johnston
Here’s How to Shoot Sports
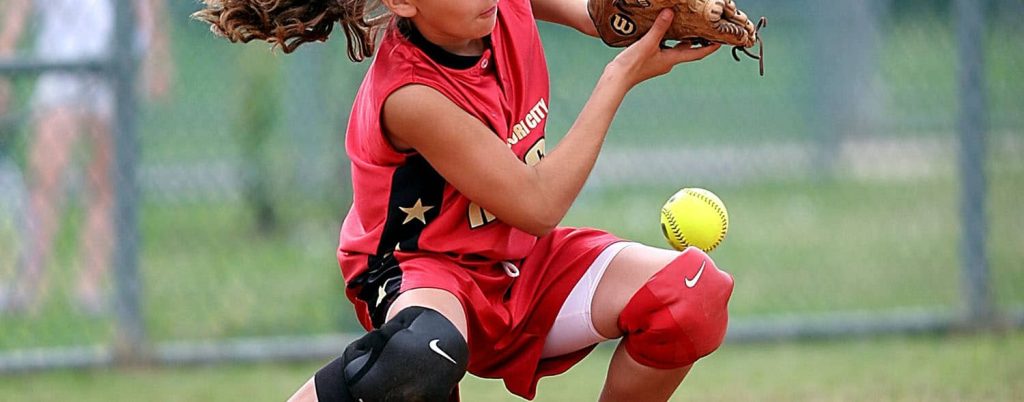
Learning to photograph sports is a process. It takes time to learn the best way to approach a sport and to get great technical skills. As I mentioned earlier, each sport is different. What works well for one sport will not work for the others. Focus on learning how to photograph one sport, and once you’ve got that down, you can move to another. Follow the tips below and you’ll be on your way to becoming a sports photographer.
Sports Photography Tips
#1: Learn the Sport
If you are not a sports fan and don’t understand the sport, it will be very difficult for you to be successful. A large part of sports photography is being in the right place and knowing what to look for.
You don’t have to be a sports expert, but you should learn about the game.
What are some of the rules that affect how the game is played? For example, in volleyball, each team can touch the ball three times before it goes back over the net. How does the game flow? Is it quick, with things changing constantly as in basketball or soccer? Or is it slower, with more wait time, as in baseball? Are there certain players who have a bigger role, like the quarterback in football?

Andre Ouellet
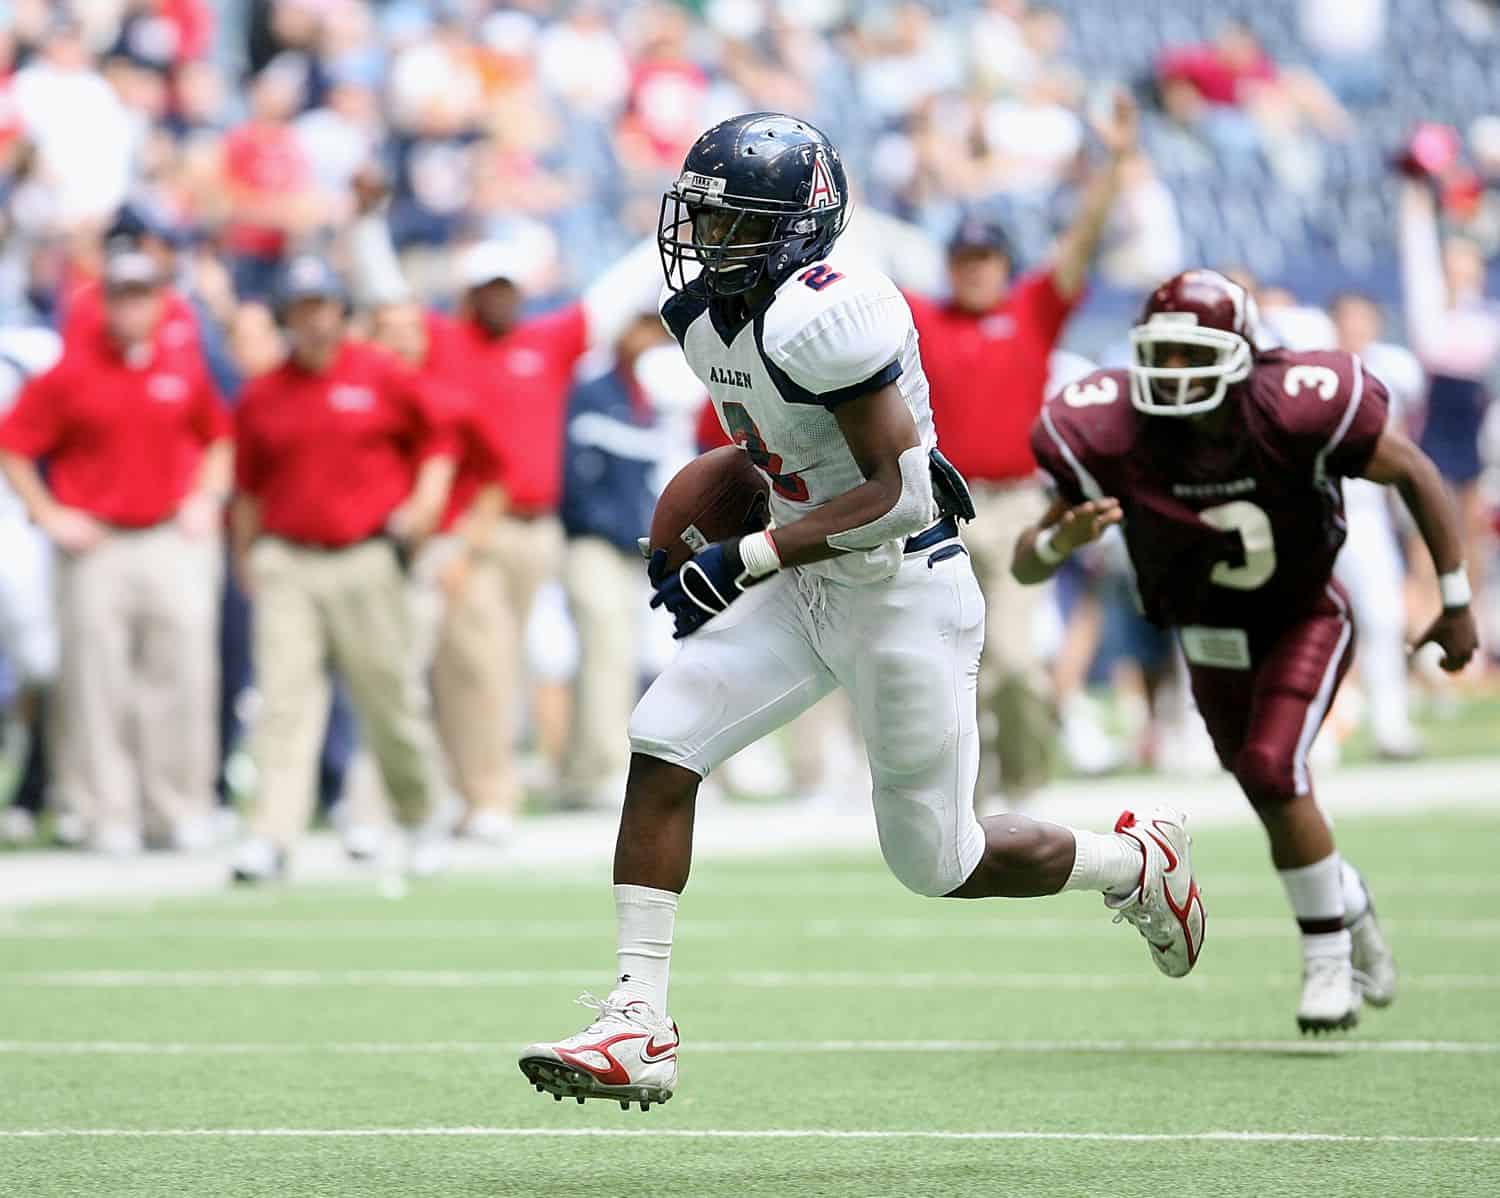
#2: Understand and Anticipate the Subject’s Movement
Once you’ve learned the basics of the sports, you’ll know what is about to happen and where you should be looking. This will give you an edge because you will react faster.
If you are constantly guessing and don’t know where to focus, you will miss 90% of the shots.
For example, in football, if it’s the third down with 12 yards to go, you can assume it’s going to be a passing play. If you know that, you’ll know to watch and follow the receivers or the quarterback. Then, if it’s the fourth down, you can expect a punt, so you might run all the way to the other side of the field to photograph the return man catching the punt.
#3: Be Ready to Adapt for Each Competitor and Team
The tricky thing about sports is that each team and competitor does things a little differently. This means you have to change with each situation. One football team might run the ball all the time while another throws the ball more. Maybe in one basketball game the best player is in the post, and at another game the point guard is the great.
In all those situations, you would be photographing things a bit differently. If you have a chance, it might be a good idea to scout out each team before the game. This way, you’ll know what to expect and won’t have to figure things out as you go.
Rojan Maharjan
#4: Familiarize Yourself with What Kind of Shots are Expected
Another thing to be aware of is what people are used to seeing. Are there certain shots that are expected? Is there a traditional way of doing things? This doesn’t mean you have to do exactly what everyone else does, but aiming for traditional shots might be the best way to begin. If you are photographing for a client, you also want to make sure you meet all their expectations.
Sports Photography Tips: Camera Settings
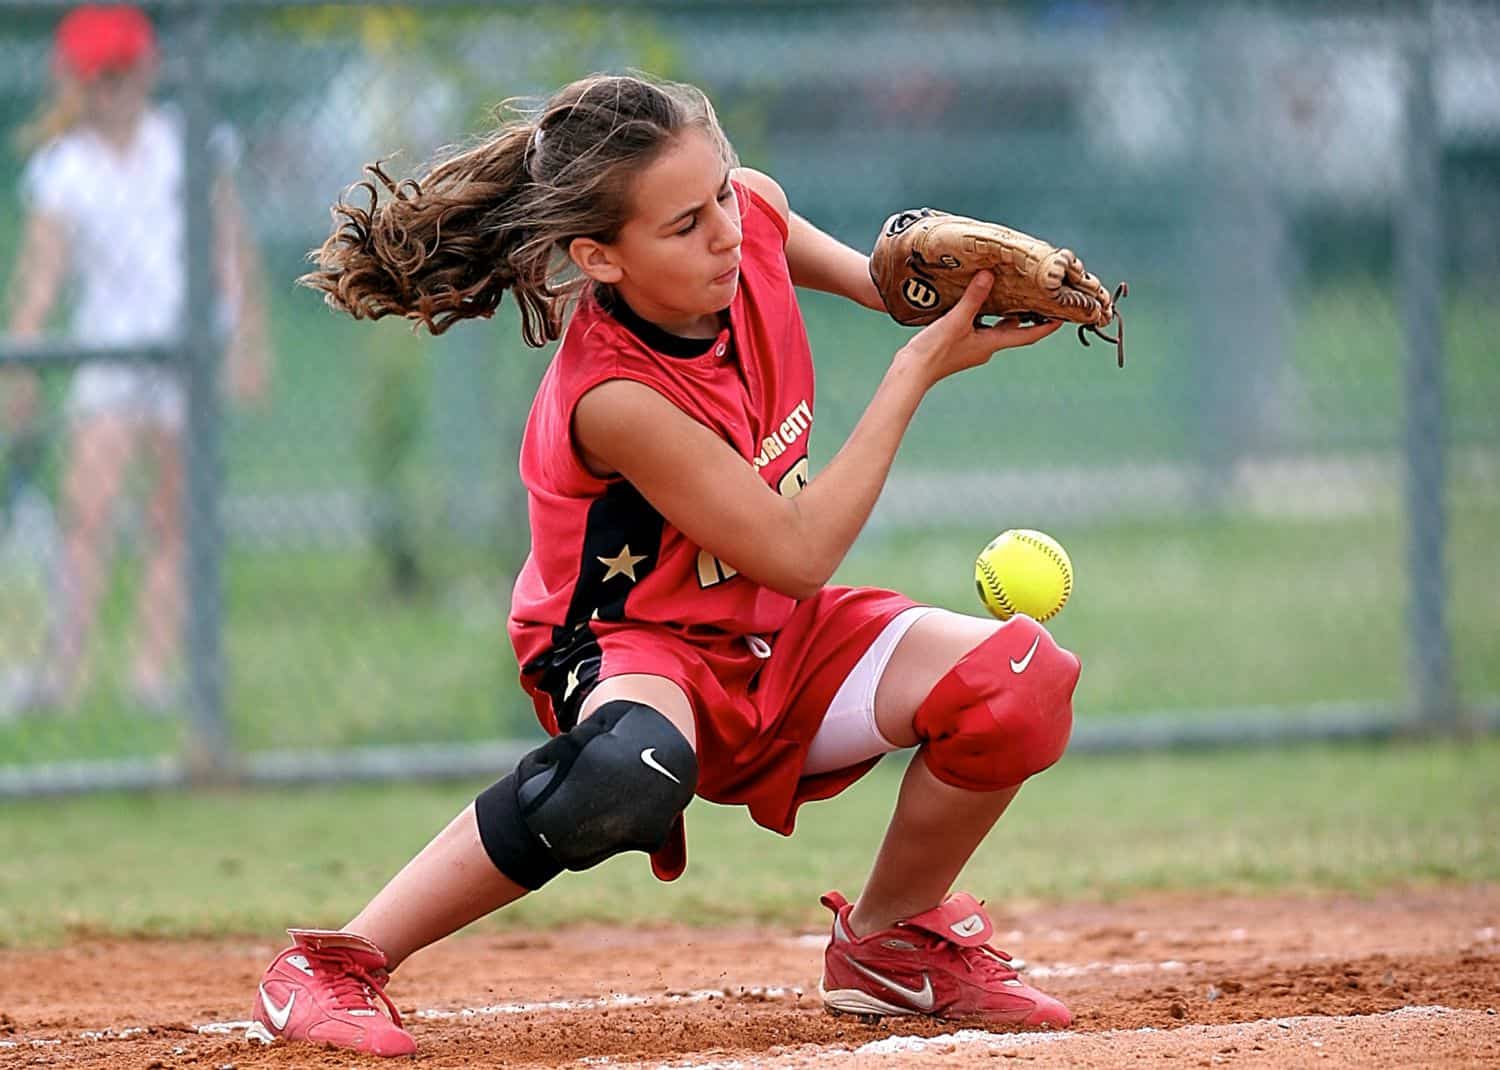
#1: Use Fast Shutter Speeds
Most sports involve fast movement like throwing a ball, running, or jumping. You want these photos to be sharp, not blurry. To do that, you’ll want to utilize fast shutter speeds.
The shutter speed can be determined by a few things:
- How long is the lens? The longer and heavier the lens, the faster you will want your shutter. It’s easier to get sharp photos at a lower shutter speed with a lightweight, wide-angle lens, than with a long, heavy lens. The general rule is to double the length of the lens. For example, at 200mm, you would want a shutter speed of 1/400″.
- How much light is there? If there is plenty of light, feel free to really use a fast shutter speed. If there isn’t much light, dial your shutter speed as low as you can where you are still getting sharp photos.
Many sports photographers use shutter priority to make sure the shutter speed stays fast enough. In shutter priority mode, the camera will lock in the shutter speed and make adjustments to the aperture to achieve the proper exposure.
Adi Goldstein
#2: Open Your Aperture
When you open your aperture, this means you are going to a lower f-stop and making the aperture hole bigger. A professional zoom lens will likely open up to f/2.8. The good thing about opening your aperture is that you’ll let in more light, which can enable you to increase your shutter speed. A wide aperture also create a shallow depth of field. This blurs the background and puts the focus on the main subject.
Selecting your aperture is critical. You want to have it as open as possible, but you don’t want something important out of focus. If you start noticing that important things are out of focus, close your aperture (increase the f-number) until the depth of field increases and all the important subjects are in focus. Again, this will vary from sport to sport and from lens to lens. In general, longer lenses will have a smaller field of focus, while a wider lens will keep most things
in focus.
#3: Increase Your ISO
Getting the perfect exposure in sports photography can be really tough. You want to have a fast enough shutter speed to freeze the action, but you also want a high enough aperture to keep things in focus. ISO is a good way to balance all of it out.
Seth Kane
Today’s cameras are beasts when it comes to ISO. Back in the day, I couldn’t take my Nikon D70 above ISO 1000. Now, people are using ISO 4000 or higher. This is great, because when you increase the ISO, you are increasing the amount of light. Now you can adjust your ISO to help get your shutter speed and aperture up.
Many of today’s new cameras have Auto ISO. With this setting, you can set a maximum ISO and the camera will adjust it up to that maximum level—but no higher. This way, you can set your shutter and aperture, and let the camera change the ISO for you as you shoot.
#4: Don’t be Afraid to Overshoot
When I first started photographing sports, it was with film. On average, I would have 36 shots on a roll of film. I had to be careful and selective with my shots, or I would risk running out of film at a crucial moment and changing rolls instead of making a great image.
Digital fixed that problem. Now, you can photograph almost as much of the action as you want. Most memory cards will hold over 1000 photos. If you have dual card slots, then your number doubles.
Take as many photos as you can when photographing sports. It can be really helpful when you are just starting out, because you won’t be thinking as much about what’s happening. When you acquire more experience, you’ll learn when to click the shutter so you aren’t wasting shots.
Andre Ouellet
#5: Use Burst Mode
Sports move so quickly! There have been times when I was slightly behind, but I missed the entire shot as a result. Burst mode allows you to shoot several shots in a row without having to push the shutter button down again. It’s like a machine gun. Each camera is different, but in burst mode, you could obtain anywhere from five frames per second to 12 frames per second.
Setting your camera to burst mode is different for each camera. In general, you are looking for Single versus Continuous mode. When in Single mode, you will have to push the shutter button for each photo. In Continuous mode, your camera will continue to take photos as long as the button is pressed down. Also within Continuous mode, there is normally a way to define how many photos should be taken in a burst.
Using burst mode lets you capture a whole sequence of great moments and movements.
This is so important because with sports, you can never be sure what is going to happen. The best shot might not be till the very end, or it might be somewhere in the middle. Burst mode lets you get all of it.
As you are anticipating and following the action, you’ll want to have your finger on the shutter button. As soon as you think something is going to happen, you start bursting. If nothing interesting happens, you can go back to waiting for that moment. Starting earlier is better than waiting and missing the shot.
Keith Johnston
#6: Focus Mode
One of the most challenging things about sports photography is focusing. Everything is moving quickly and people are running in front of each other; some people are close and others are far away. It’s nearly impossible to get every shot in focus, but there are a few things you can do to maximize your in-focus photos.
One, choose whether you are shooting sports in manual or autofocus mode. I know it might blow your mind that, with today’s technology, someone might choose manual focus; but there are situations where this might come in handy. I know some sports photographers who have been making sports images with manual focus their entire life, and they prefer to have total control. Another example of when to use manual focus might be during a volleyball match. Autofocus will often focus on the net instead of the subjects behind it, but you can overcome that issue by using manual focus.
If you do use autofocus, change the focus mode to continuous autofocus (AF-C).
In this mode, you can keep your finger pressed halfway on the shutter button or use an alternative button for focusing, and the camera will self-adjust its focus as the subject moves closer or further away.
One last trick used by sports photographers is to use the autofocus lock (AF Lock) button to keep from losing focus in high-action moments. In some situations, you know where you want to focus, but something is going to get in the way. For example, you’re focusing on the shortstop in baseball, but the runner will block that view. Make sure you are focused on the shortstop, not the runner. Once you have your subject in focus, you can hold down the AF-L button to lock in the focus. Then, if something runs in front of your subject, the camera will not lose focus.
Adi Goldstein
#7: Shoot in JPEG
One problem with burst mode is the increased potential that your camera will freeze. When you take a photo, the camera writes that information to the memory card. When you’re creating something like 10 frames per second, that’s a lot of information to write. Often, the camera will stop letting you take photos until it has caught back up.
One way to address this is to purchase memory cards with fast write speeds. Another solution is to shoot in JPEG. These files will be much smaller than RAW files, so you can take more pictures in a row without the camera slowing down or stopping.
Shooting in JPEG helps with storage as well. Depending on your camera, a RAW file may be anywhere from 20 to 40MB, whereas a JPEG file of the same image would be only one to 10MB in size. This means approximately ten to twenty times as many JPEG photos as RAW photos will fit on a single card.
Keith Johnston
#8: Perfect Your White Balance
If you choose to shoot in JPEG, you will want to get the photo nearly perfect in camera. Yes, you can do some editing with JPEGs, but white balance is difficult to fix in post. Lighting will vary from sport to sport and arena to arena. In general, I don’t trust auto white balance. I will normally scroll through the different presets until I find one that looks right. Then, I will make any smaller tweaks in the white balance shift setting.
One thing I’ve noticed is that certain arena lights will appear to flicker or pulse on and off. You’ll especially see this when you take a burst of photos; several will look fine, but a few will be underexposed. If you find yourself in this situation, there isn’t a ton you can do about it, but know that it isn’t something you are doing wrong. It’s just the lights.
4 Great Sports Photography Techniques
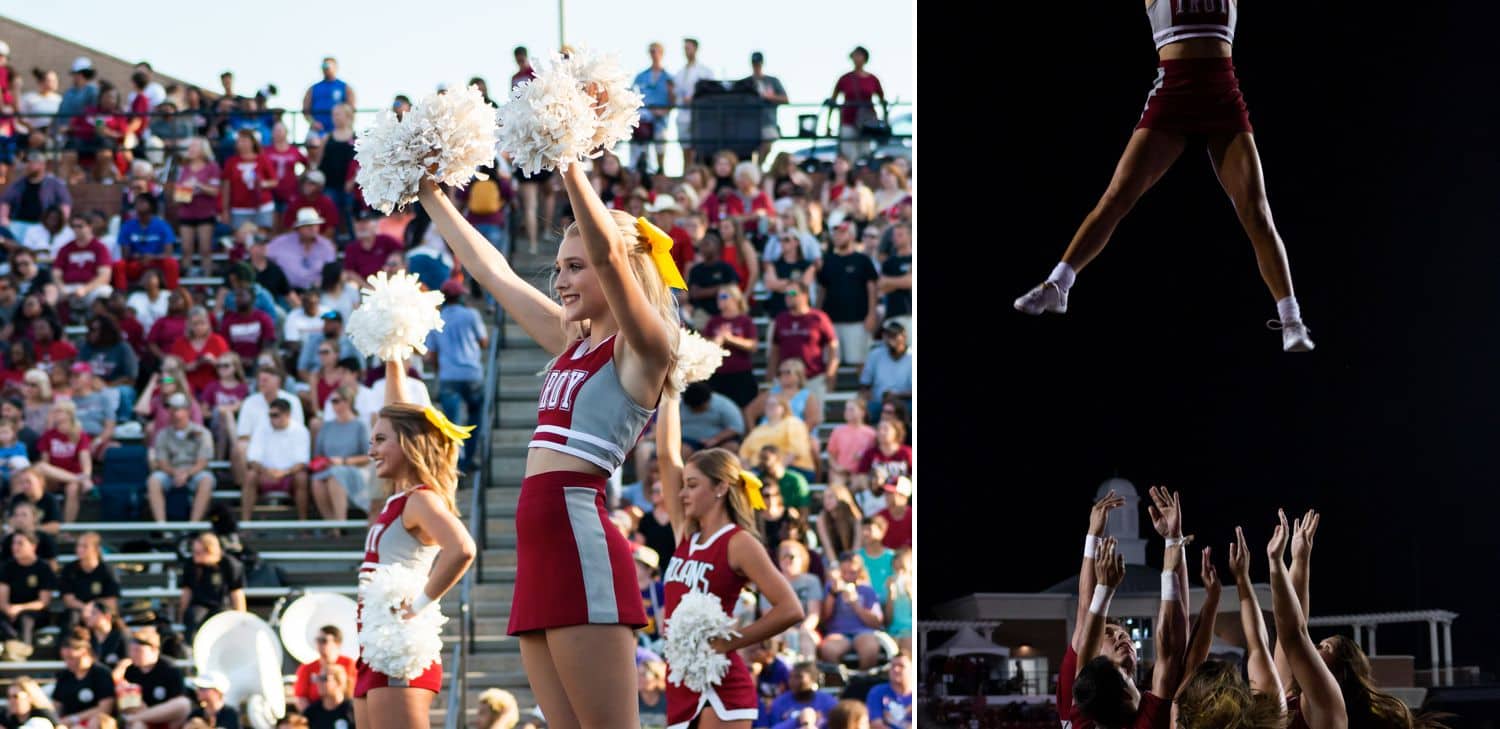
#1: Tight Compositions
People really connect with sports images that are up-close and personal. It’s like they’re right there in the action! Try to shoot as tightly as possible, or else the images won’t be that much different than what the fans can see from the stands.
#2: Keep Your Eyes on the Action
I don’t know how many times this has happened to me. I stop and look at the back of my camera to check a photo, then when I look up, I realize I missed something. Don’t do this! Try to stay focused on the action as much as you can.
Andre Ouellet
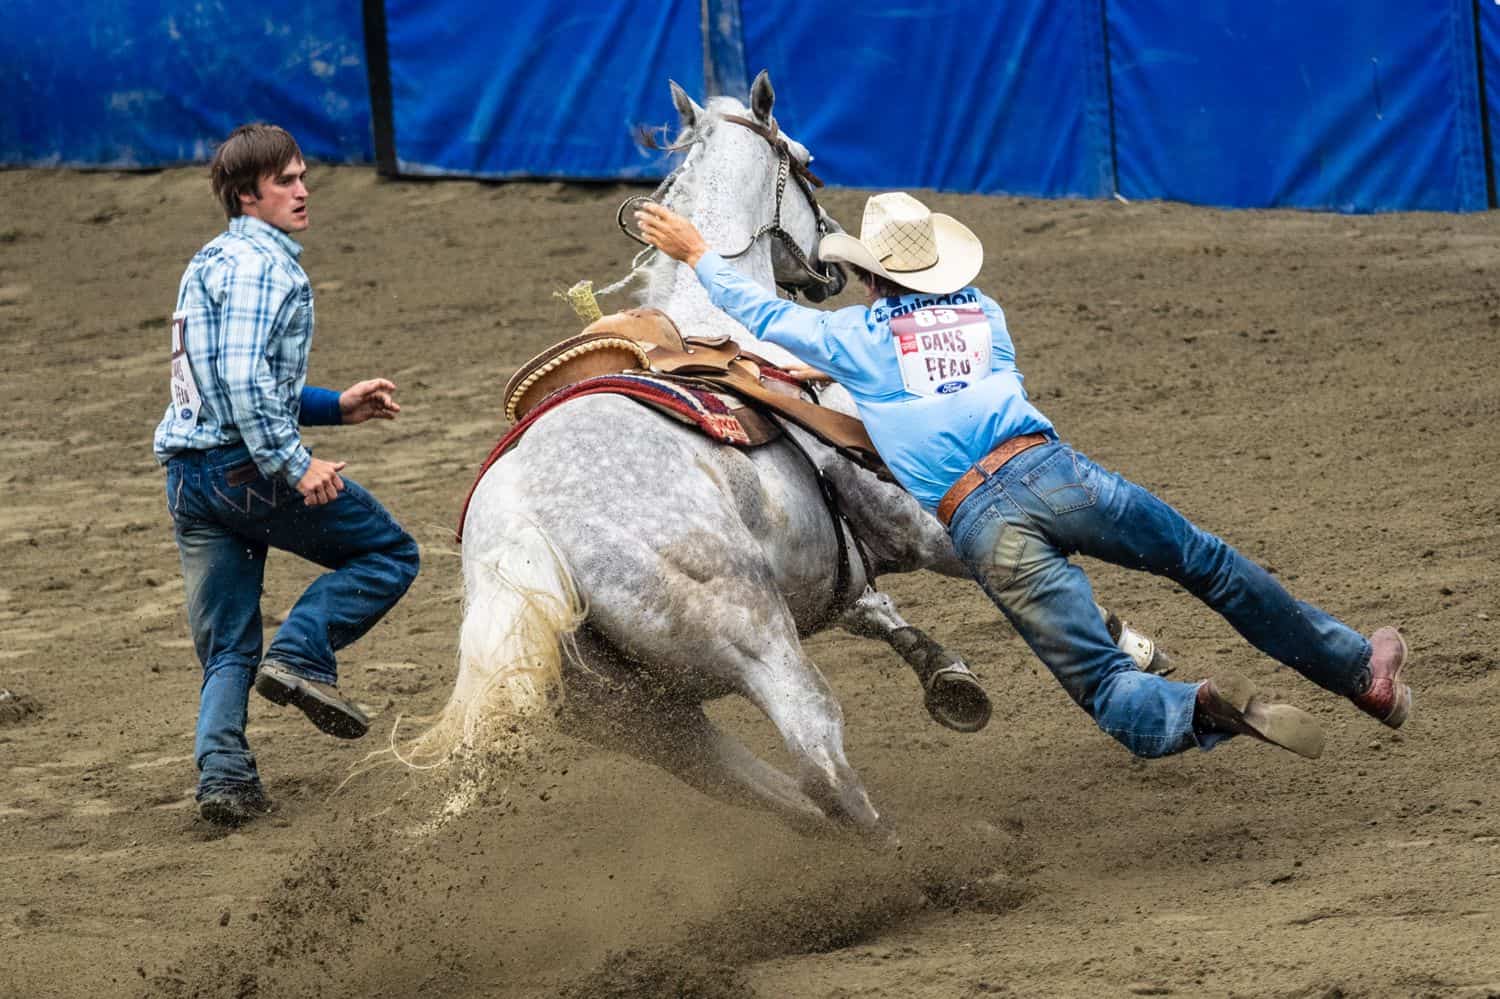
#3: Look for the In-Between Moments
Some of the greatest moments happen between plays—not on the field. It could be a coach getting fired up, an emotional player, or something interesting happening in the stands. Even if the game is on a break, be ready. Keep looking around and scanning for opportunities.
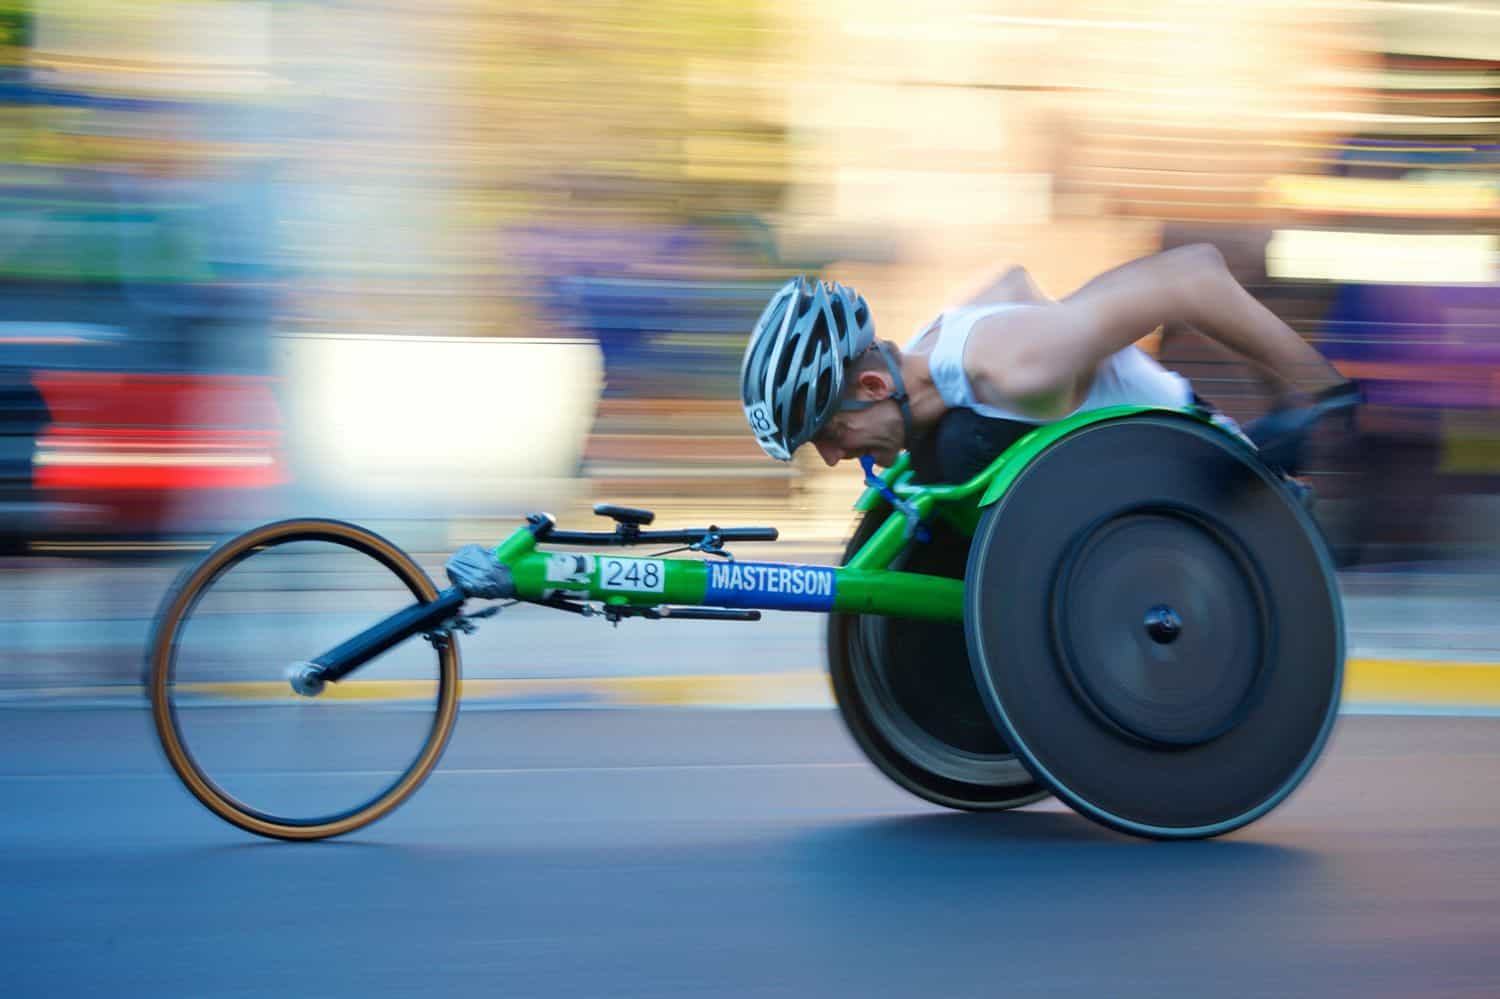
#4: The Panning Technique
To use the panning technique, follow the action with your camera. When you do this, the subject stays in focus, but the background has motion blur in the direction of the movement. This isn’t something you should do on every shot, but it is a way to create a different look with your photos.
Find the Perfect Position for Shooting Sports
#1: See Their Faces
When you are taking photos of people, you typically want their faces in the shot. This applies even when the athletes are wearing helmets. Always position yourself so that you can see the faces of the athletes.
For example, if I were photographing basketball, I would choose a few key positions. If I want to get photos of the team on offense, I’ll stand near the goal so I can see the players’ faces as they move toward the hoop. To get photos of the defense, I’ll choose a spot to the side so I could see the players looking at the athletes they are guarding.
Keith Johnston
#2: Don’t Forget About the Location of the Sun
With outdoor sporting events, you have to think about the location of the sun. For portraits, I tend to put the sun behind my subjects so they won’t be squinting. Sports can be a little different, however. The athletes aren’t really looking at you or the sun, so squinting isn’t really an issue. The bigger problem I’ve run into when shooting into the sun is getting a lot of lens flare. If you have the choice, put the sun behind you so everything is lit evenly and you won’t have lens flare.
#3: Look for Interesting Backgrounds
For sports like marathons or biking, you can really move around and seek out an interesting background.
Take time before the game or event to scout the location. You might find some cool graffiti, a famous building, or a beautiful landscape. The background isn’t the most important element in sports photography, but it can make your photos stand out from your competition.
#4: Be Safe
I’m a big guy, but I have no interest in being run over by a football player wearing a helmet and pads, running full speed. When you select your shooting position, make sure you will be safe.
Each sport has its own dangers, but in general, you want to make sure you are far enough away from the action or have some form of protection. For football, you need to be back behind the marked lines. For baseball, you want to have a fence in between you and the ball or be far enough away so you can react.
At most high-profile events, there are rules in place and people to enforce them. At low-profile events, however, you will need to protect yourself.

Keith Johnston
Sports Photography Gear
Just like with all types of photography, you need certain gear when you photograph athletic events. Exactly what you need will vary depending on the sport, but here are some general guidelines.
Choose the Right Camera
There is no perfect camera out there, but there are some things you’ll want to look for in your camera:
- frames per second
- speed of focus
- ISO performance
- battery life
- available lenses
Select the Best Lenses
In sports photography, you deal with a wide variety of situations, so you’ll want different lenses with varying focal lengths. At one game you might be 75 feet away from your subject with very little available light, and then at the next event you’ll find yourself five feet away in the bright sun.
To manage these conditions, some people choose zoom lenses with multiple focal lengths built in, while others may prefer prime lenses. I think both are good options. Here are some of the most common qualities you need in your lenses:
- f/4 or wider (preferably f/2.8)
- quick autofocus
- wide (17-35mm), medium (24-70), telephoto (70-200mm), and super telephoto (300mm or above) focal lengths

Adi Goldstein
How to Handle Lighting
Lighting can be very difficult in sports photography. The fields of play are quite large, which makes them challenging to light evenly. If you want to be able to photograph from any spot at any time, you might need four or more flashes.
In most cases, this isn’t practical and not what really happens. If you plan to mount a flash on a light stand or somewhere up high, it’s best to focus on one area of play. For example, if you are photographing basketball, set up your light so you are only shooting on one half of the court and in one direction.
For most sports, however, the easiest solution is to simply use the existing, ambient light.
Tripods and Monopods for Sports Photography
When you start using bigger lenses, you may need a tripod or monopod to help hold it steady amidst the action. I suggest a monopod for most situations, because it’s easier and quicker to move and adjust than a tripod.
There are tons of monopods and tripods out there. Make sure to look at how much weight each can support—remember to consider the weight of both the camera and lens together. Also, if a tripod head is included, what kind is it? Some heads swivel in all directions, while others only allow for one adjustment at a time. Lastly, how tall does the tripod or monopod get? Can you use it in both standing and kneeling positions?
Andre Ouellet
Protect Your Photography Equipment While Photographing Sports
A lot can happen to your gear when you’re photographing sports. It can be smashed, dropped, rained on, or exposed to extreme temperatures.
The best way to protect your gear is to be prepared.
- Make sure you are being safe, like we already talked about.
- Bring towels, raincoats, and gear specifically with built-in rain protection.
- When possible, take breaks or switch out your gear. If you are photographing in the snow, use one body for a while, then safely put it safely and switch to another.
Post-Production and Sports Photography
Photographing sports is a lot of fun, but all the post-processing work can be dull. The biggest issue is getting through all of those photos. When you are capturing five to ten frames per second, the photos add up quickly. Start by quickly going through and rating your favorite images—just the best of the best. (You can use a program like Photo Mechanic to do this very quickly.)
Once you’ve narrowed down your selections, make your exposure adjustments. A Photoshop action sequence or a Lightroom preset can help you quickly make general adjustments to your white balance, contrast, saturation, and other settings.
Keith Johnston
Let the Fun Begin
Sports photography is what got me into photography. I would do it every day if I could. If you love sports, you’ll love all the action and excitement that come with trying to capture the great moments as they happen right in front of you. It does take some time, practice, and effort to get good at sports photography, but once you start nailing those shots, you’ll be addicted for life.
Written by: BRYAN STRIEGLER | Photographs by: KEITH JOHNSTON, ADI GOLDSTEIN, ANDRE OUELLET, ROJAN MAHARJAN, SETH KANE
Bryan Striegler is a wedding photographer who loves superheroes, sports, and skittles. Along with his saint of a wife and their crew of kids, Bryan lives in northwest Arkansas where, in his free time, he’s constantly searching for the next great Netflix binge.
Nail the shot, every time!
Contributor