Pro photographer Elizabeth Blank explains how to shoot underwater photographs, get the right gear, stay safe, and book awesome clients.
6 Steps to Stunning Underwater Images
Thanks to increasingly affordable gear and advances in post-production technology, pretty much anyone can photograph underwater. But if you want to make seriously stunning underwater images, taking the photo is just the beginning.
We asked underwater photography expert Elizabeth Blank: How do you make such gorgeous underwater images?
Get ready to learn! Scroll to find:
- Your complete underwater equipment list
- How to market underwater sessions
- Shoot your first underwater session
- Water safety: your number one priority
- How to edit underwater photos
- Get your gorgeous images into your clients’ hands
Elizabeth Blank
#1: Your complete underwater equipment list
Atlanta-based Elizabeth Blank doesn’t look like an underwater photographer. Far from being a sunburned, sand-encrusted surf enthusiast, Elizabeth is petite, fair, and put-together in that Southern brunch sort of way. But when she arrives at a client’s home to photograph, she’s zipped into a sleeveless wetsuit and lugging what looks like a modified crystal ball.
Spoiler: it’s not a crystal ball. It’s an underwater camera housing!
The gizmo Elizabeth carries isn’t, of course, a crystal ball. (Although how awesome would THAT niche be?) It’s an underwater camera housing, and it’s the most important tool she’ll use during her session.
The handmade housing includes a clear, hard half-bubble attached to a brightly colored box with handles. Put your camera in the bubble-box; then the entire contraption is water safe and ready to shoot submerged!
You can NOT photograph underwater without a watertight housing! So don’t cheap out and buy some off-brand knock-off. Get a pro-approved camera housing, and your camera will stay safe and sound.
>>> SHOP underwater camera housings from Elizabeth’s favorite brand, SPL

“What kind of camera do I need?”
Elizabeth first began shooting underwater with a compact Olympus Tough TG-6. “I could shoot RAW on the TG-6,” says Elizabeth, “but the noise was terrible! Then I tried the Nikon Z7, but the files were SO big, they slowed down the write time.“
Now, Elizabeth shoots with a mirrorless Nikon Z6. With her Z6, Elizabeth can shoot in fast bursts and still get files large enough to deliver huge wall prints and canvases.
“Which lens is best for pool portraits?”
Wider lenses are best for underwater photographs made in a swimming pool. The wide focal length allows you to shoot close to your subject and capture plenty of the watery world around them. Shooting wide also gives you plenty of room for cropping, so your final frame is always perfect.
- Does your camera have a full frame sensor? Try 24mm and 35mm lenses.
- Is your camera equipped with a crop sensor? Try a 14mm for extra-wide shots with minimal distortion.
Elizabeth Blank
“What should I wear to an underwater session?”
Elizabeth opts for a sleeveless wetsuit when she’s photographing underwater. The wetsuit is a modest option that provides sun protection as well as warmth when she’s submerged in cold pool water.
One unexpected piece of Elizabeth’s wardrobe is her weight belt. “The camera housing is full of air,” she explains. “So when I go underwater, that dome is super, super buoyant, and it’ll pull me right back up to the surface.”
To counteract the housing’s buoyancy, Elizabeth straps a weight belt around her waist before entering the pool. The weight isn’t enough to prevent her from surfacing, of course; but it helps her anchor herself in the water while she’s shooting.
“Do I need an assistant?”
Photo assistants are always helpful. When you first begin offering underwater sessions, you may want to budget for an assistant who can help you manage your gear as you get in and out of the pool.
“What about lighting?”
You certainly can use strobes and flashes to enhance your underwater images, but if you’re shooting during the day, you don’t necessarily need any additional lighting. Bear in mind: even if you waterproof your strobes and fire them underwater, you’ll need quite a bit of power to illuminate your subject through the dense water. Once you take into consideration your camera’s sync speed, artificial lighting may create more problems than it solves.
Elizabeth Blank
#2: How to market underwater sessions
Since 2010, Elizabeth had built a thriving family portrait business. But by 2017, facing creative burnout, she decided it was time to step away from traditional portraiture.
In a dramatic shift, she relaunched her business as a full-time underwater photography experience. Here’s how she did it:
Show what you want to sell
“The first thing I did was to stop showing anything other than underwater pictures on social media,” Elizabeth tells me. “This shift was a little bit confusing to my long-time portrait clients. They were used to seeing families and babies, and now I was showing all these underwater images. But I knew I had to change my portfolio if I wanted to refocus my brand.”
Elizabeth’s extensive portfolio overhaul did result in a smaller client base, but this new clientele wanted something only she could deliver. “When someone wants to hire me, I already know that they’re my target client. Does that make sense?” she asks.
Here’s what she means…
Know your clientele
Elizabeth learned that underwater photography attracted a very specific clientele:
- clients who wanted an uncommon experience
- families with enough disposable income to invest in custom art
- a clientele whose homes have space for massive canvases and wall galleries
“Last year,” Elizabeth shares, “someone contacted me and asked, Can you quote me a price for a six-foot piece of wall art? They just wanted a massive piece of personalized art for a huge, empty wall—in their pool house.” Elizabeth laughs. “The needs of my underwater clients are just a little bit different!”
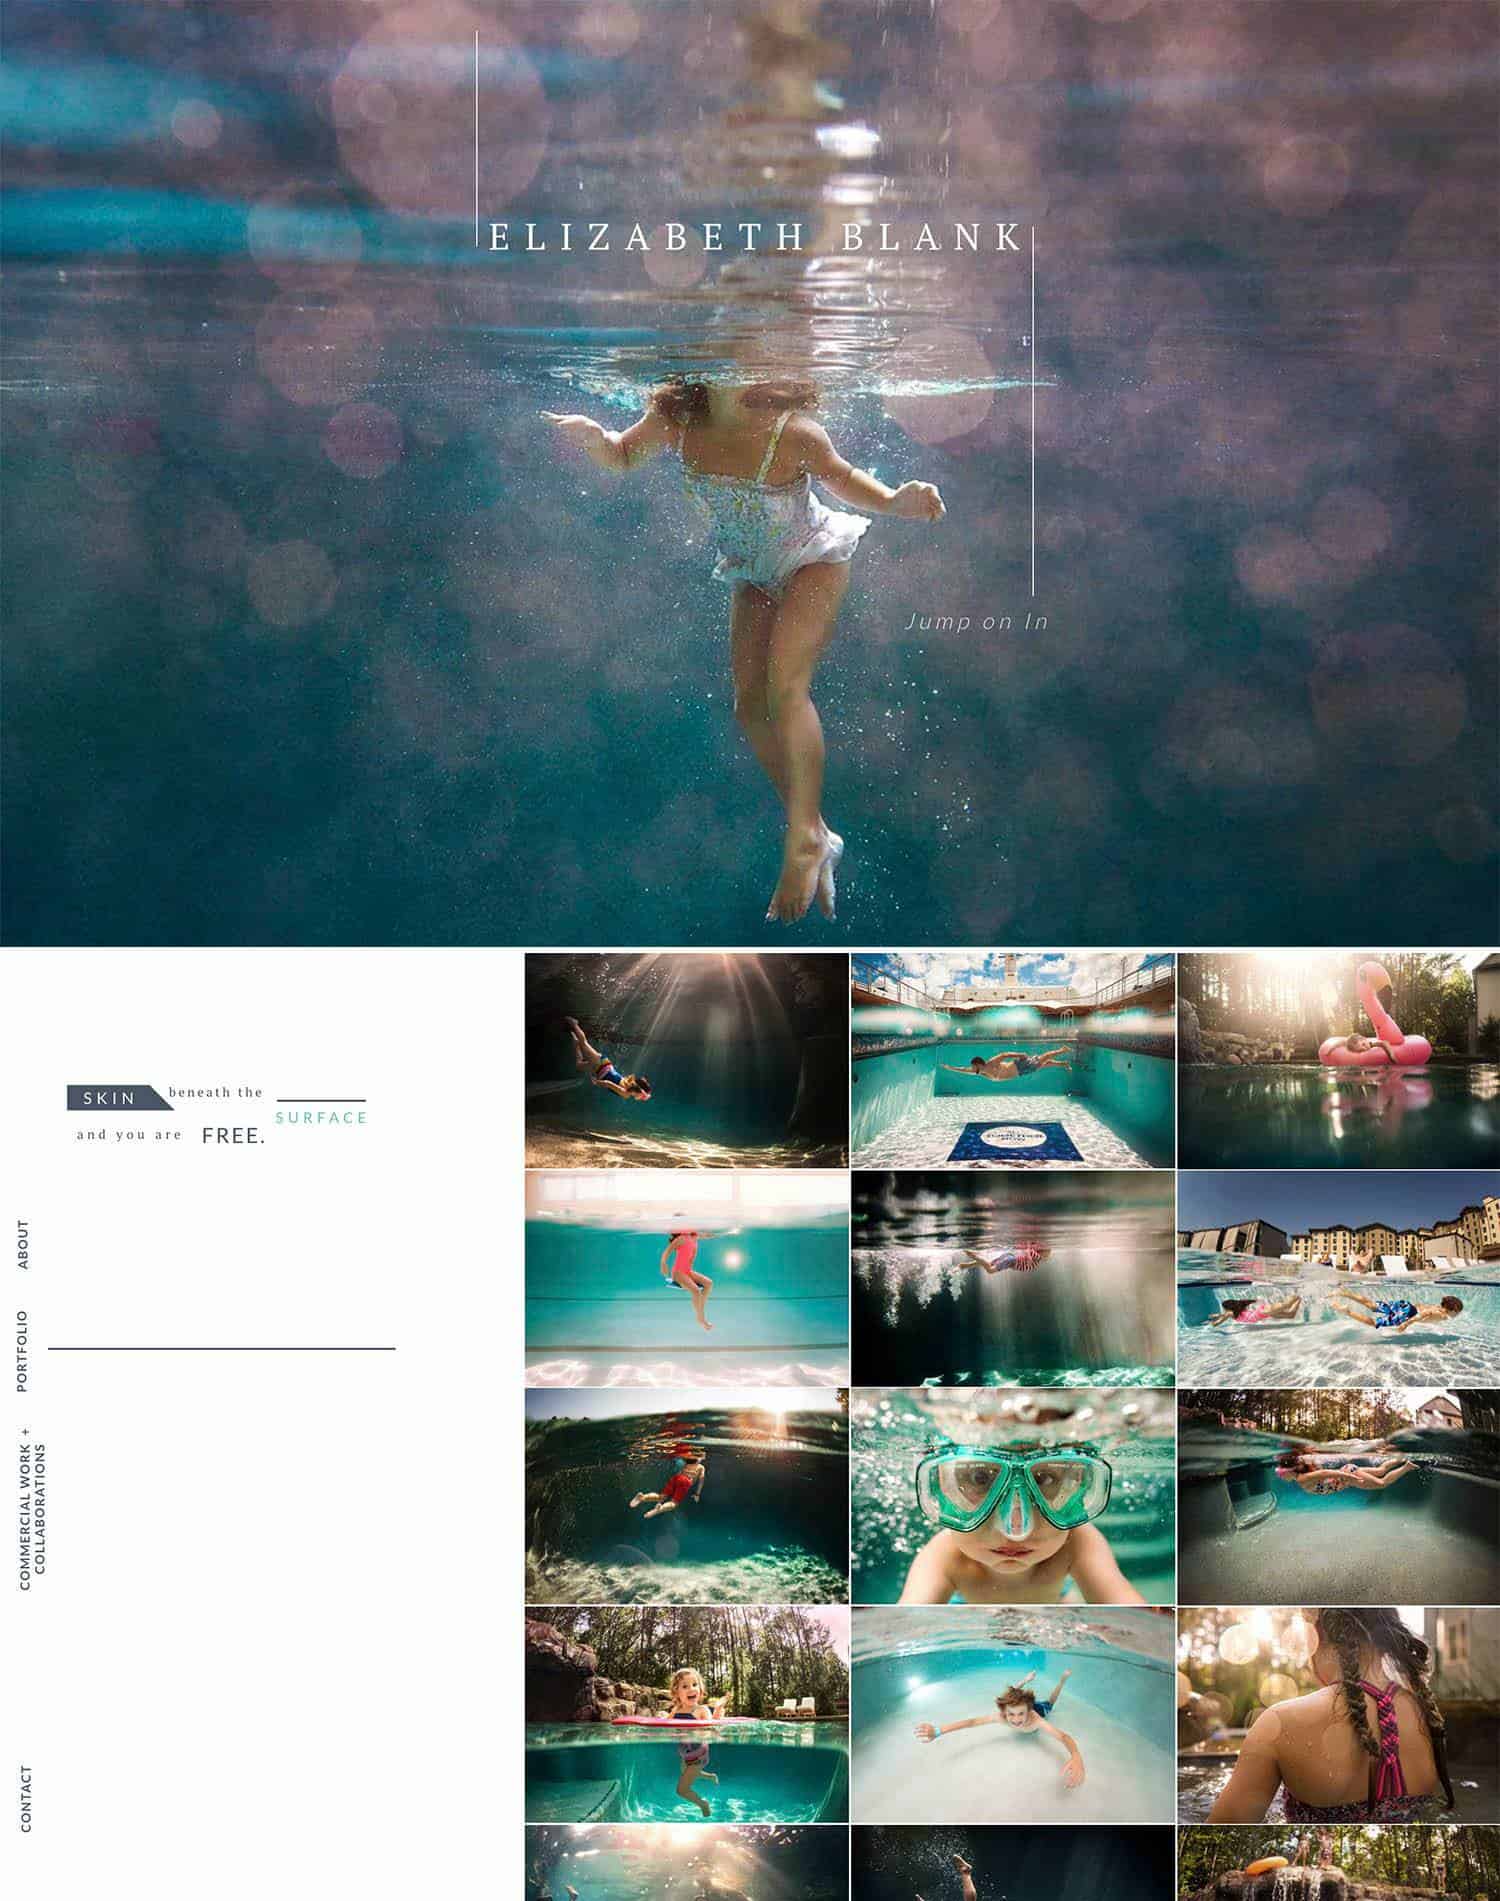
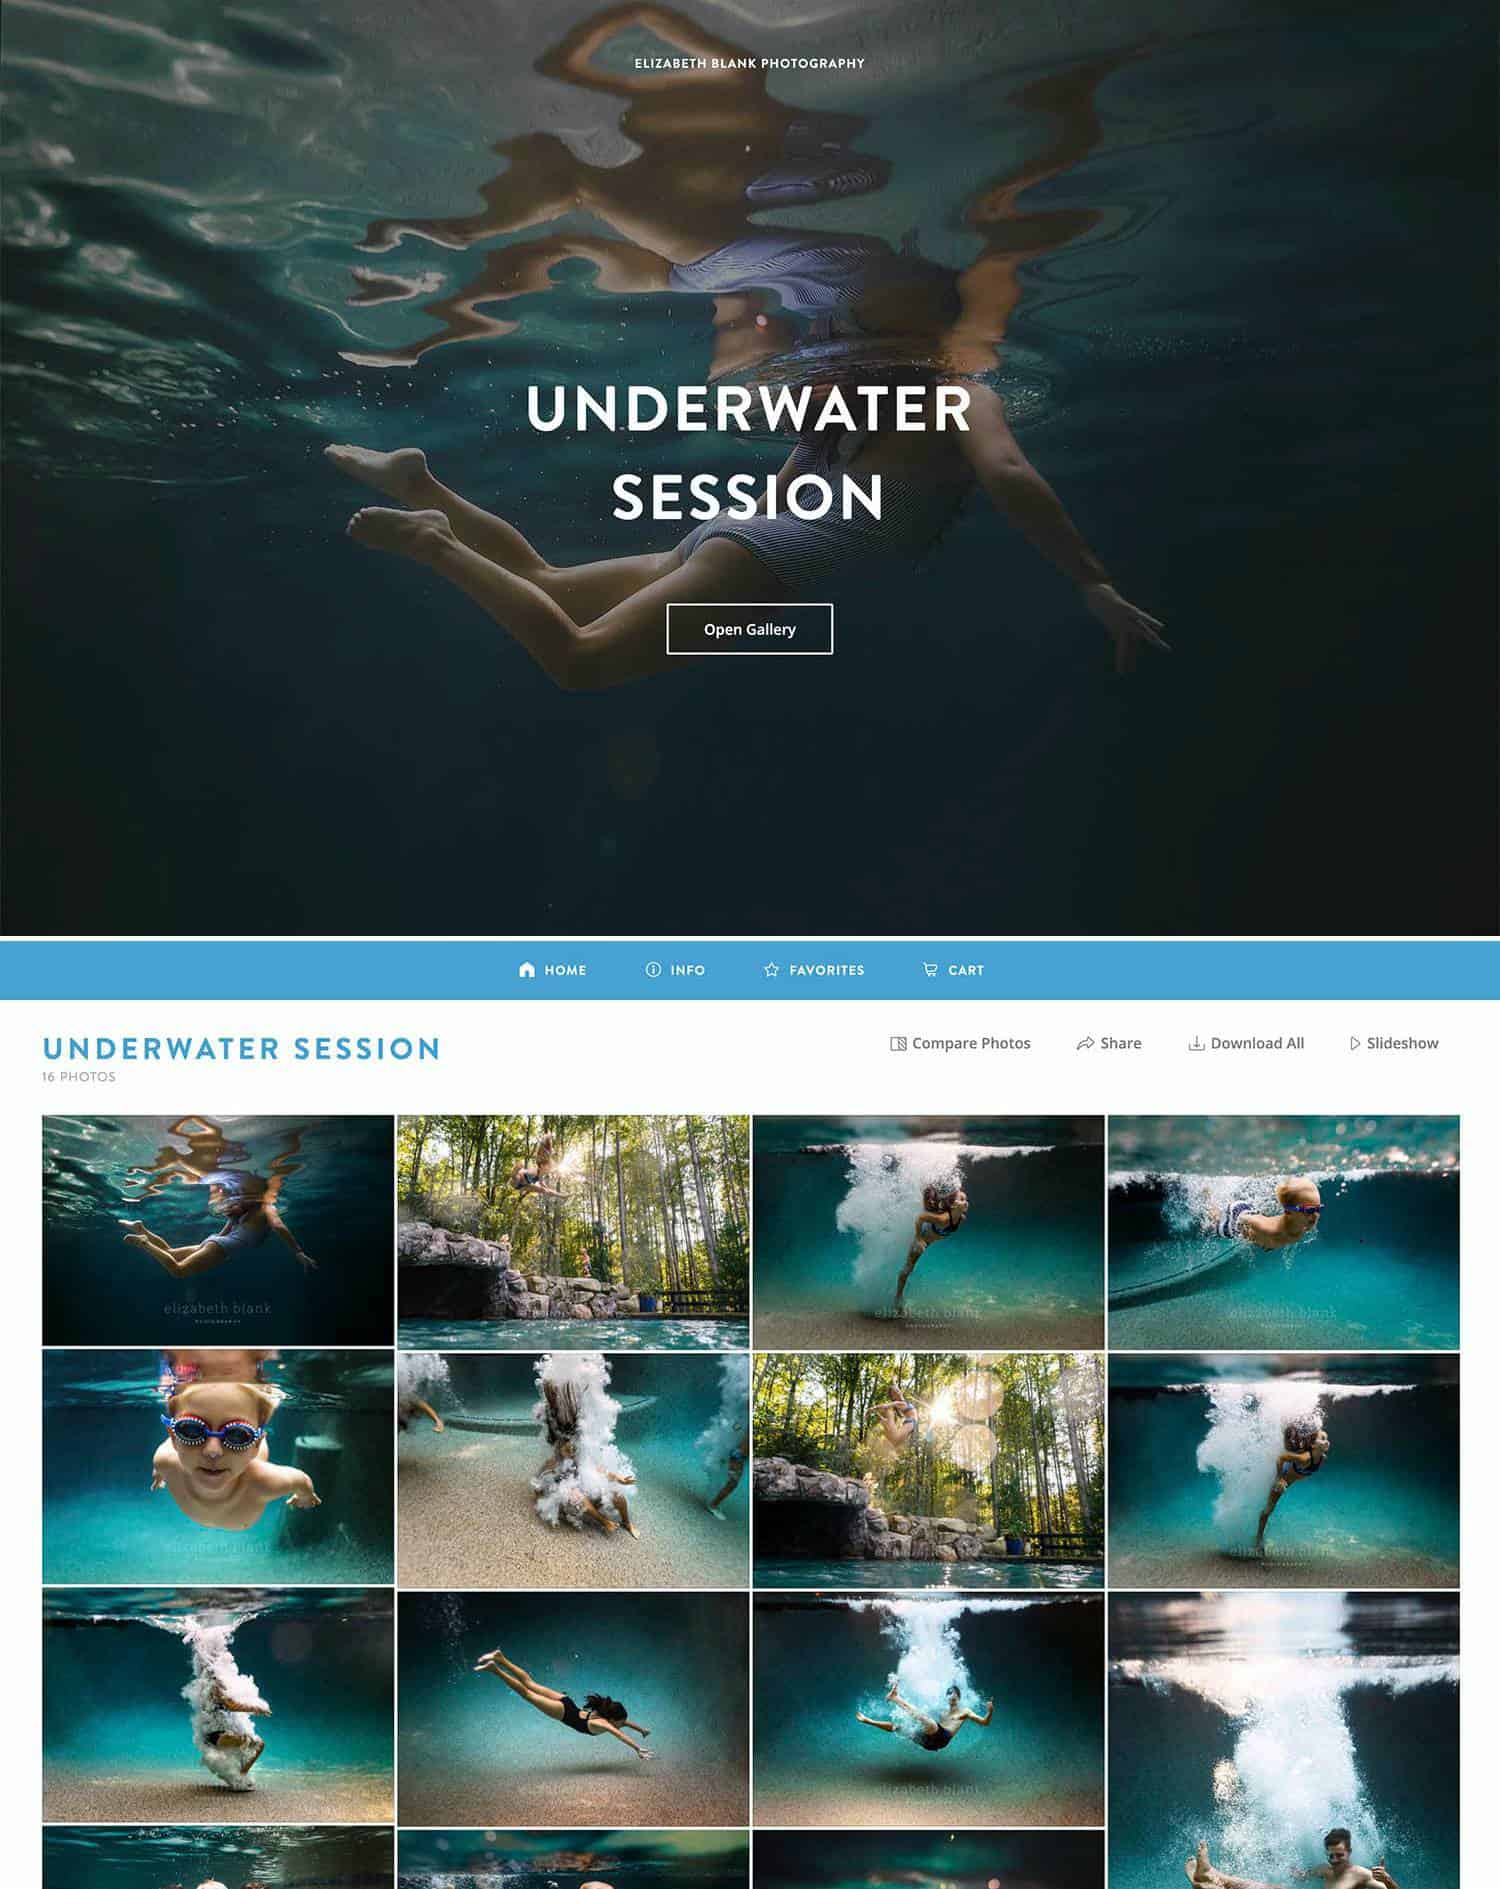
Elizabeth Blank’s website
Speak your clients’ language
In addition to refining her social media content, Elizabeth reimagined all of her visual marketing to speak directly to her ideal demographic. Her website’s homepage feels like a piece of art, and her portfolio is rich with clean lines and thoughtful negative space—much like the images her clients commission her to make.
Become a specialist
Elizabeth certainly isn’t the only incredible underwater photographer in the world, nor is she the first to offer submerged sessions. But she recognized the novelty of her niche and capitalized on it. The more she shot, the more she showed, and the better-known she became. Pretty soon, throughout the Atlanta market and beyond, folks associated underwater portraits with Elizabeth Blank.
#ShootProofPRO Tip: Focus your portfolio
Don’t confuse potential clients with an “I do everything!” portfolio. Keep your website and social media focused intentionally on your unique style and skillset. If you specialize in more than one style, you may need more than one website and multiple social media profiles.
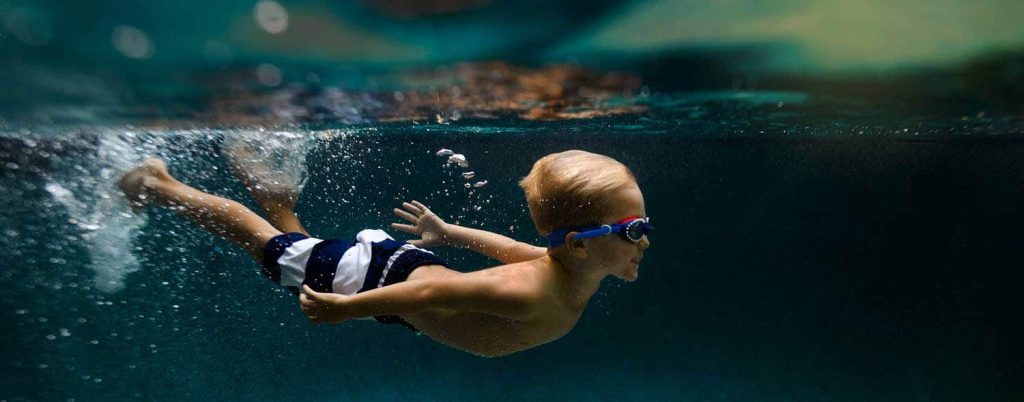
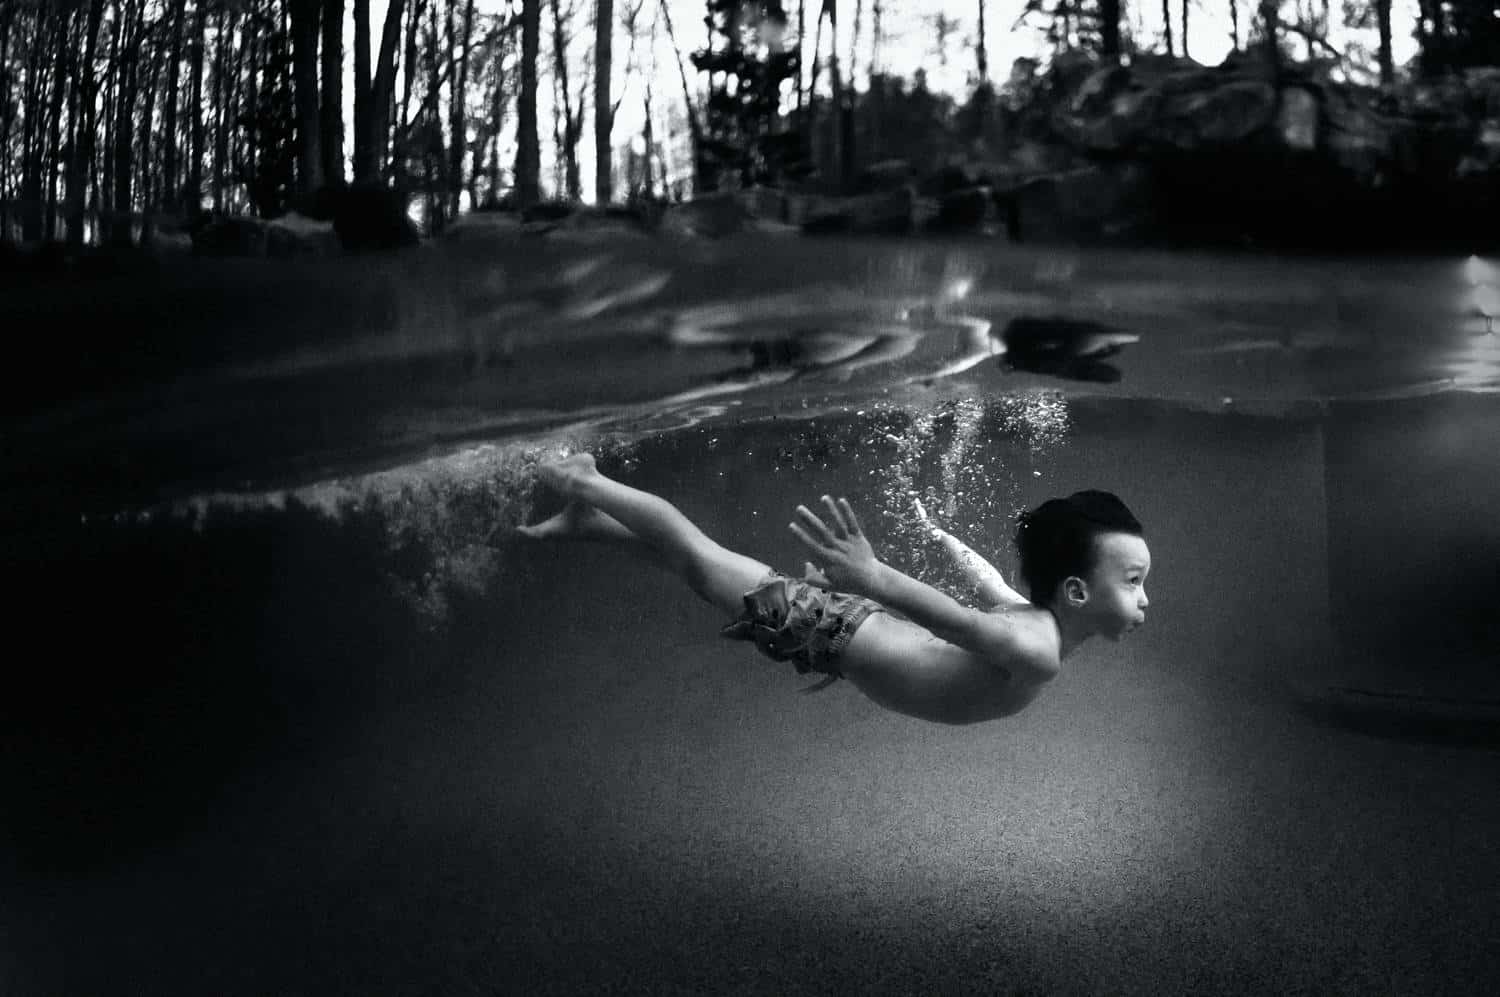
#3: Shoot your first underwater session
Elizabeth took her first underwater photos in her own swimming pool. While her kids swam and dove and kicked and played, she learned how sunlight filters through pool water, how chlorine impacts color and clarity, and how to anchor herself to prevent motion blur—lessons that proved priceless as Elizabeth began shooting in clients’ pools.
This is what you can expect:
Know what you’re shooting for
Elizabeth never shoots without knowing exactly what her client is hoping to get out of the session. She asks questions like:
- Where will the final image go in your home?
- Will you hang it in a pastel-painted, soft-toned dining room?
- Or are you planning to display it in a bright, vivacious playroom?
These details help Elizabeth offer advice on bathing suit colors, pool toys to include, and even her final post-production approach.
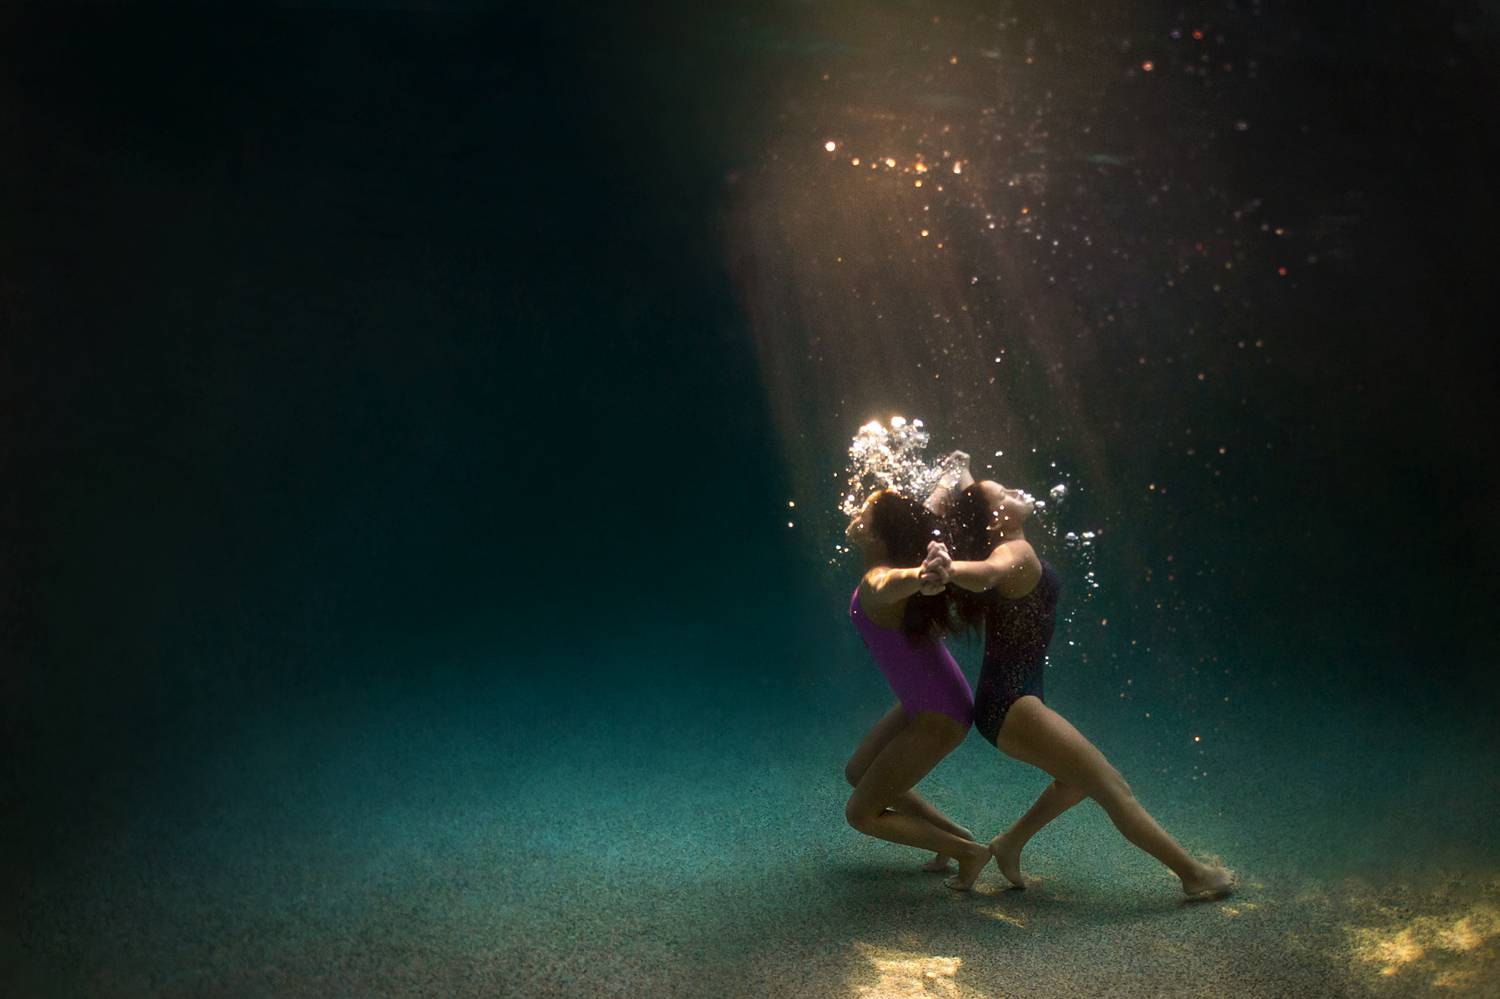
“If they’re going for a softer look,” Elizabeth explains, “I’ll likely avoid any direct sun rays. Instead, I’ll place them in a more muted space within the pool. Alternately, if I’m photographing a bride and I want to showcase her veil, I’ll use those harsher beams of light to enhance the detail.”
Keep reading to learn more about using sun beams in your underwater images!
Elizabeth Blank
Prepare to shoot in unfamiliar waters (literally)
Much like photographing in a client’s home, shooting in an unfamiliar pool presents unique challenges. “Sometimes I’d arrive, and the pool would be murky from chemicals or littered with pool toys and water beetles,” Elizabeth explains. She learned to help her clients prepare their pool for photographs.
It’s also helpful to ask your clients for a few snapshots of their pool area. Have them make the photos at the same time of day as their session so you can see what kind of light you’ll be working with.
How to adjust your camera settings
Elizabeth sets her ISO and aperture before she even puts her camera in its housing. “Shutter speed is the easiest to adjust once my camera is in the housing unit,” she explains.
In manual mode, she sets her exposure for the surface of the pool, then adjusts her shutter speed as needed once she’s under the water. “It’s surprisingly bright under there,” says Elizabeth. “If I was to go out right now, at almost 2:00 P.M. on a sunny day, I would probably preset my ISO to 500 and my aperture to f/4, then my shutter speed would likely end up around 1/2000 or faster.”

Elizabeth Blank
>>> Aperture Tip
It can be hard to get crystal-clear focus underwater. Close down your aperture to at least f/4 or f/5.6, and you’ll get sharper pictures than if you shoot wide open.
>>> Shutter Speed Tip
Your client will be moving once they’re submerged—the water makes it impossible to stay completely still. Keep your shutter speed on the higher side to ensure motion-free photos. A minimum shutter speed of 1/250 should be enough to prevent any motion blur.
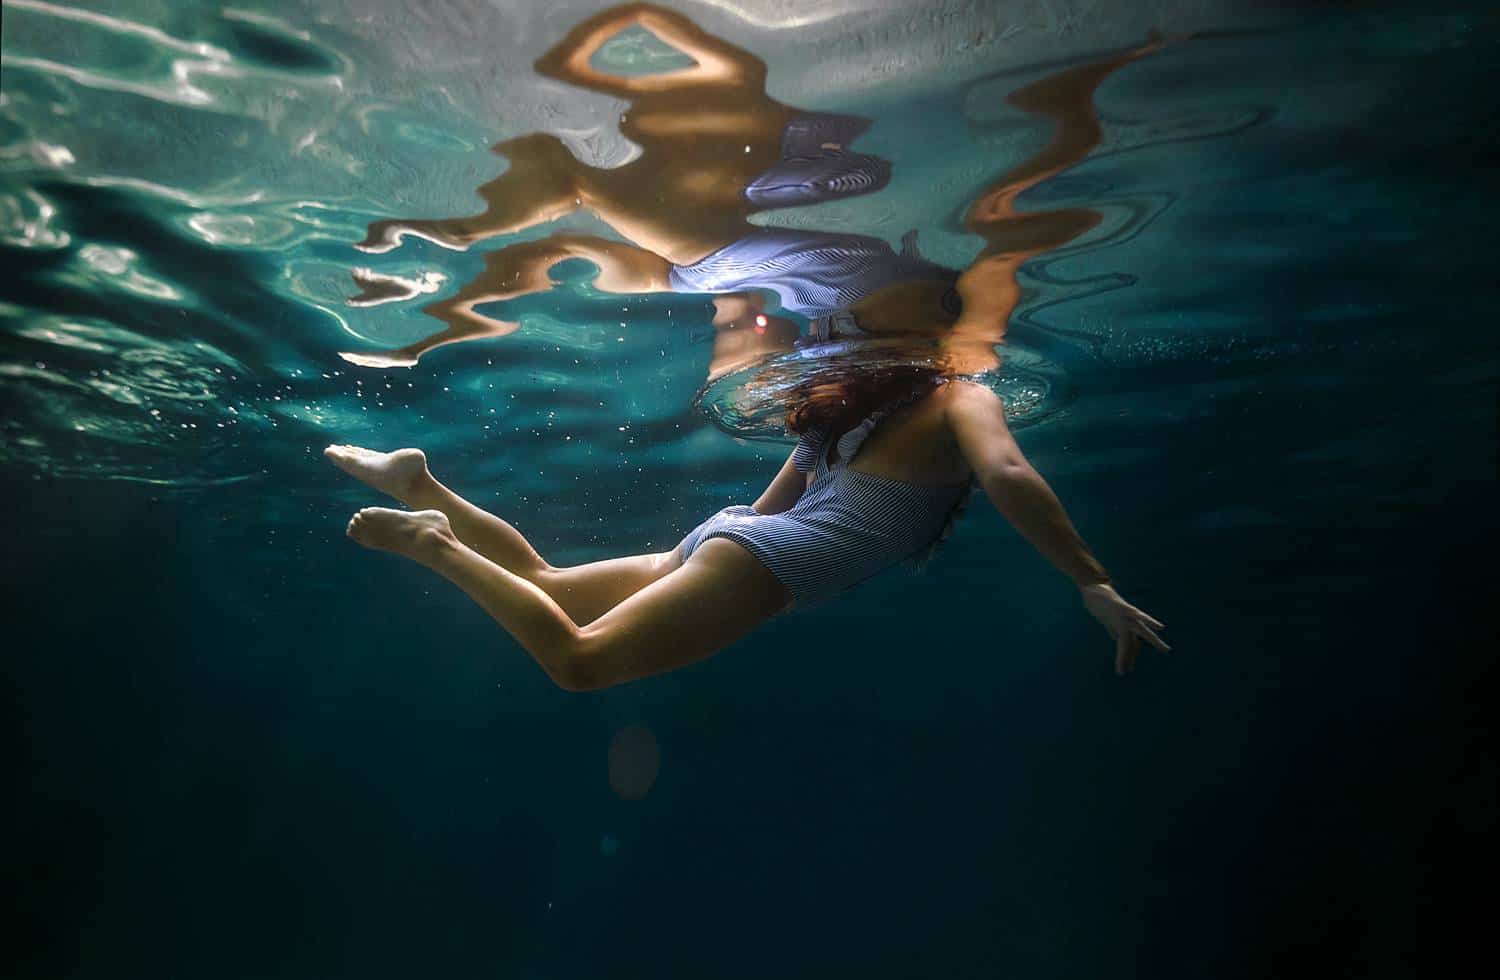
Get your light right
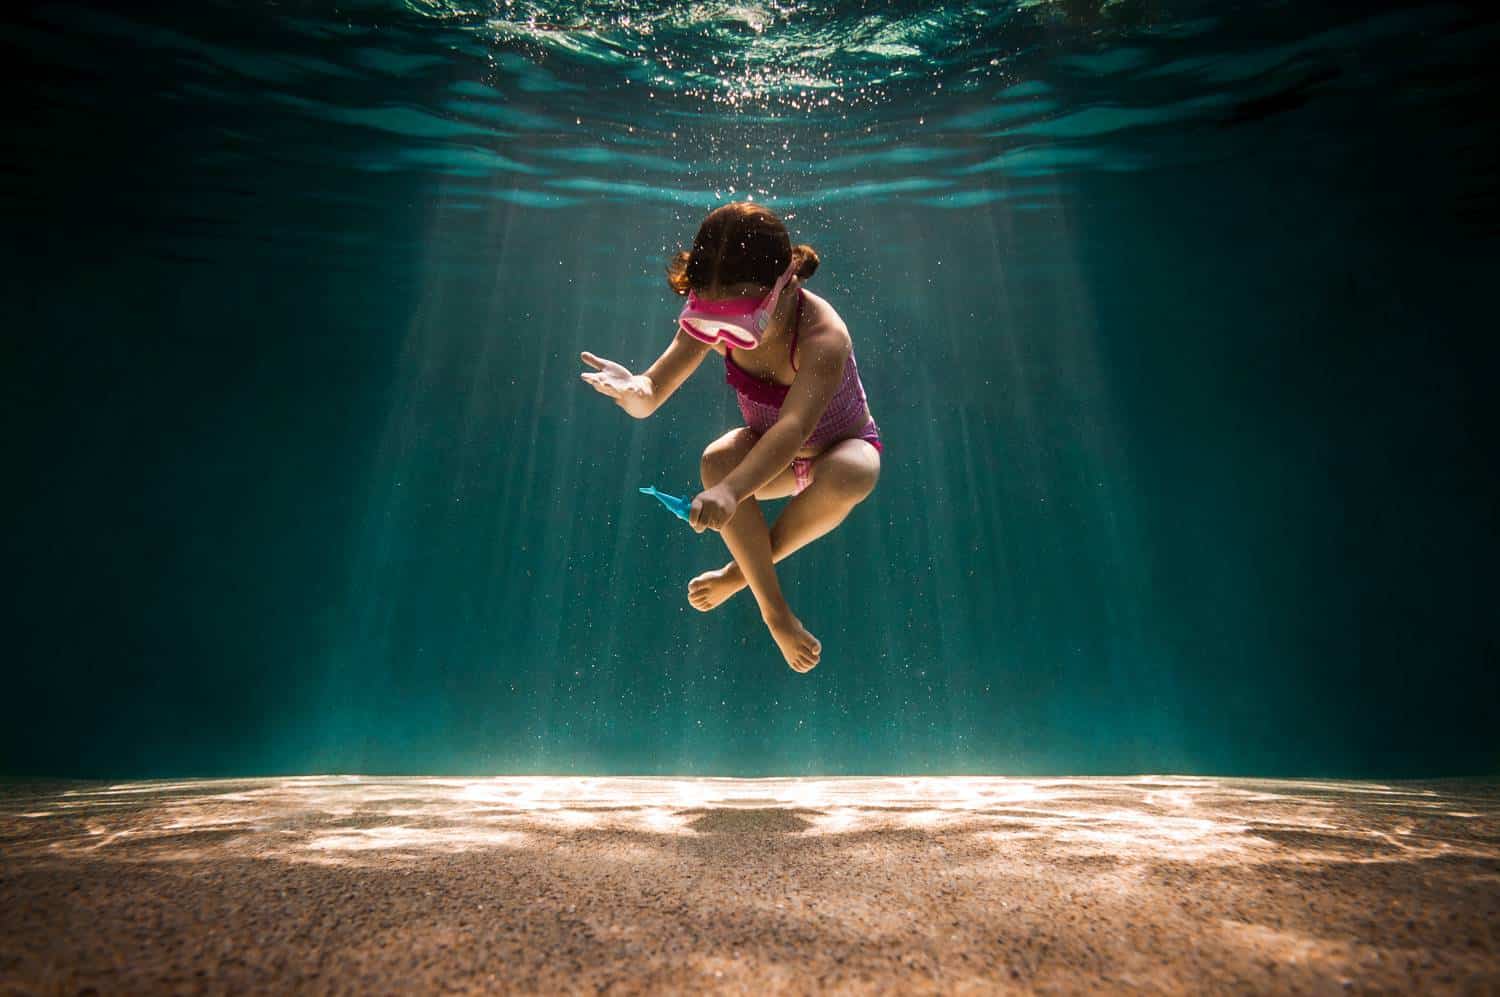
Photographers tend to avoid dappled lighting when making traditional portraits. However, that same wild light can be gorgeous when you shoot underwater!
“So, those hotspots on the water? I’ve learned that they create amazing light rays when you dip beneath the surface!” Elizabeth explains. “If you compose your image to include both your subject and the light rays, you’ll add a really interesting element to the picture.”
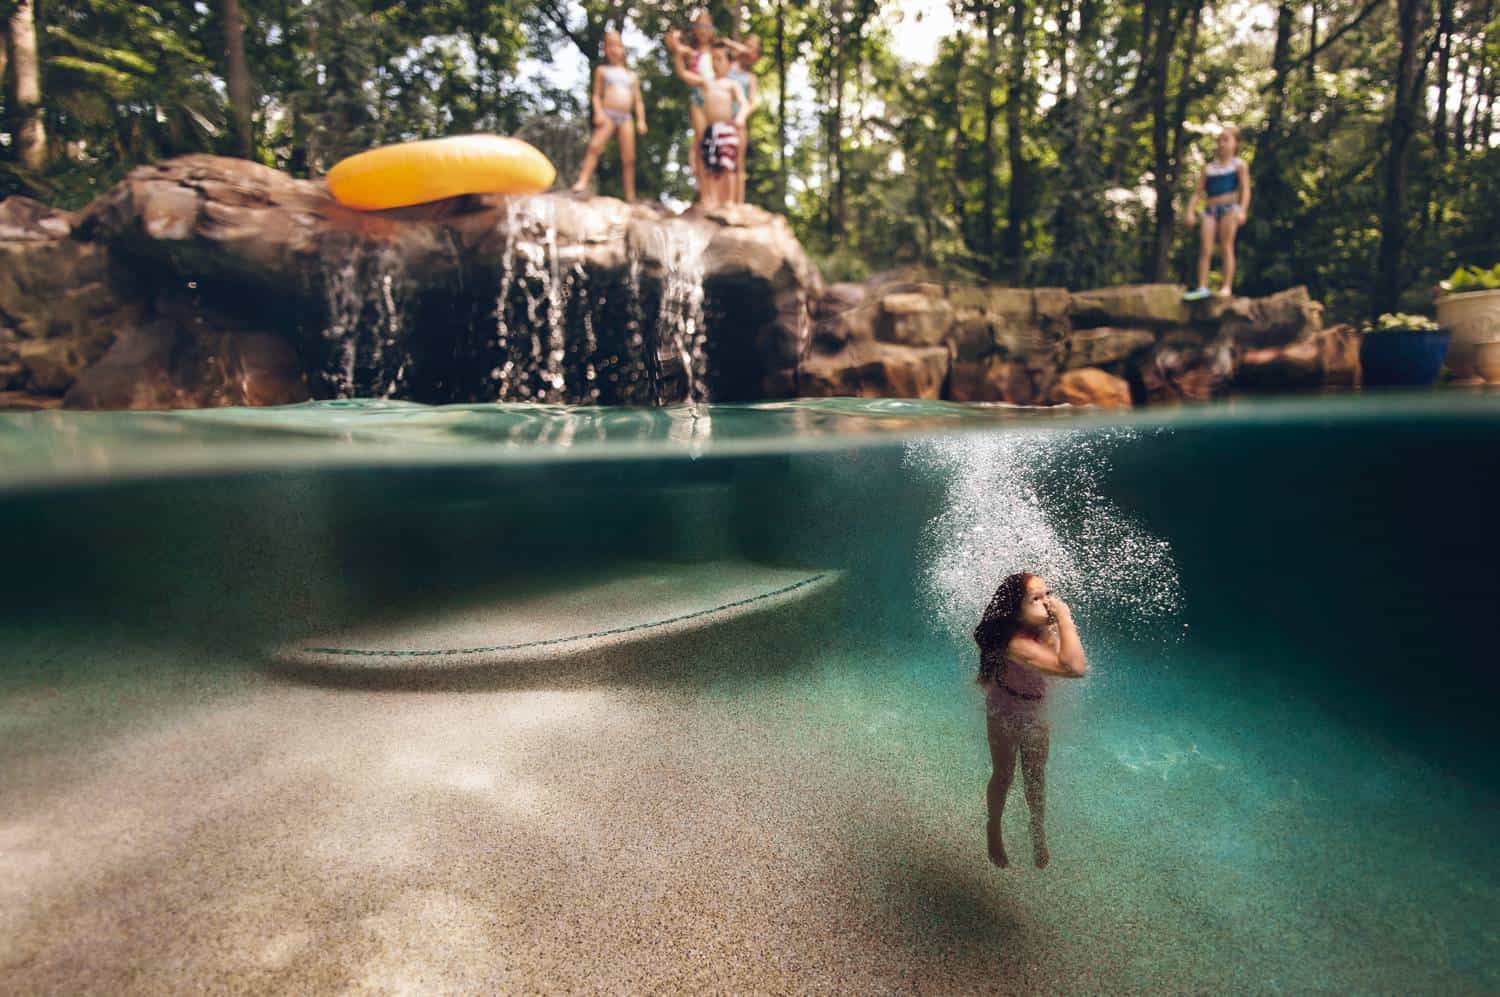
“I also love shooting split level images,” Elizabeth raves about her photos that simultaneously capture the world above and below the water. “The closer you are to the surface, the less light is lost!”
Elizabeth Blank
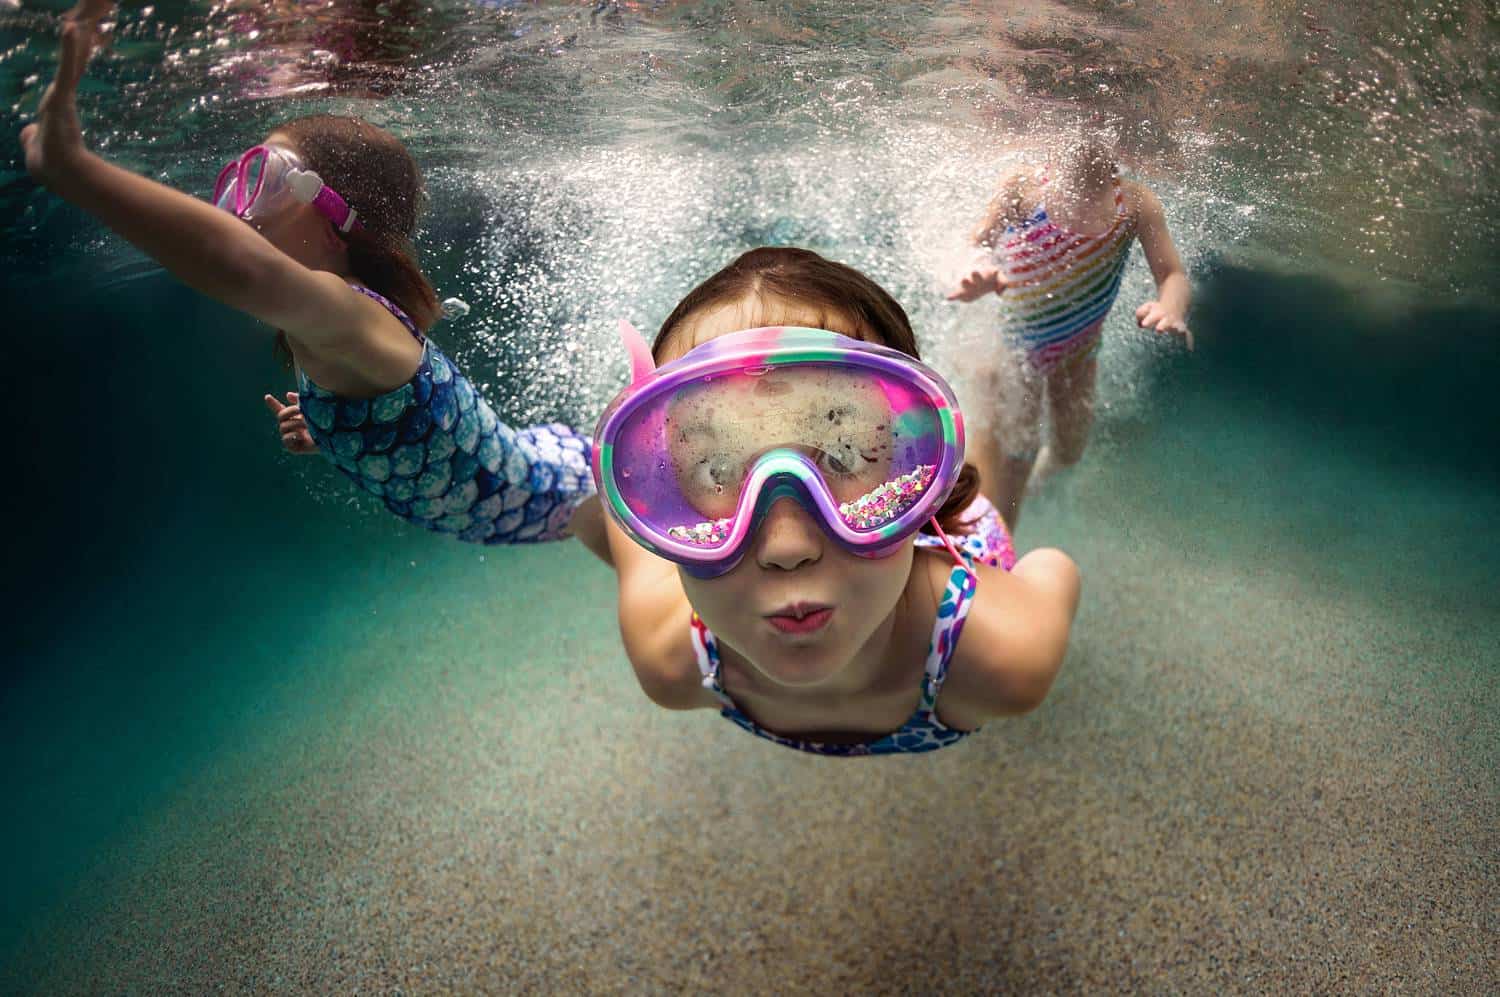
Customize your white balance
It’s impossible to get gorgeous skin tones when you’re shooting underwater—unless you customize your white balance beforehand.
“I shoot with my white balance set to Kelvin, typically around 5,600 to 6,000, and that gets my skin tones a bit closer to accurate than auto white balance,” Elizabeth reveals. “I try to get that correct in-camera, because that saves me a ton of time editing later!”
It’s seriously okay to overshoot
Elizabeth’s underwater portrait sessions typically last anywhere from 45 minutes to over an hour. Her goal? To deliver a gallery of unique, frame-worthy photos. So she shoots until she knows she has the images she needs.
“I tend to overshoot,” admits Elizabeth, “because shooting underwater is really hard! I’ll wind up with 400 or so images, but I only select about 10%-15% of those photos for editing.”
With your camera in its underwater housing, you can’t scroll through your latest photos to make sure you’re getting what you want. “It’s kind of like shooting film,” says Elizabeth. “You have limited control over the environment, you can’t communicate with your subject, and you need to make sure your photos are sharp. I shoot a LOT to make sure I’ve nailed the shot!”
Elizabeth Blank
#4: Water safety: your number one priority
This goes without saying, but we’ll say it anyway: when you’re photographing in, under, or around water, you must have a safety plan.
Get the parents involved
The first step in safety preparation is to communicate with the parents. Elizabeth tells each parent-client, “When I’m shooting, I need you to act as a lifeguard. I need you to watch your kids just as you would if they were in a pool all alone.” Occasionally, one parent will opt to be in the pool—out of the photos, but close enough to assist if their child is in crisis.
“Don’t ever worry that you’re too close or that you’ll ruin my shot,” Elizabeth tells her clients. “Safety is the number one.”
Elizabeth Blank
Know the child’s swimming ability
The families who commission Elizabeth tend to be confidant swimmers. They have their own pools that they use regularly, which decreases the chances that someone will be hurt.
If a child still needs flotation devices, Elizabeth wants to know in advance. However, most of her clients are strong swimmers.
“When I asked one of my family’s about their five-year-old’s swimming ability,” she shares, “her parents said, She’s the best swimmer in our family. I’ll admit: I kind of rolled my eyes at that. But when I got to their home, it was true! The kid could swim like a fish!”
Know your own limitations
Child safety is just one factor. You also need to take into account your own safety when shooting underwater!
Elizabeth prefers to shoot from the shallow water end of the pool, where she can easily pop back up for air at any time. “Since it takes me a moment to get in place, I tell the kids to count to four before diving or swimming or whatever else we’re trying to photograph,” she describes.
Once COVID cases have sufficiently declined, Elizabeth also has plans to get scuba certified, which will expand her options for underwater safety.

Elizabeth Blank
Be healthy to be safer
Another way to improve your underwater safety is to simply take care of your body. “When I’ve slept well and eaten healthy, my lungs are noticeably stronger,” Elizabeth explains. “Some days I’ll go under and feel like I’m basically dying, and I’ll realize, maybe I shouldn’t have had wine last night…!”
To be a strong, healthy underwater photographer, focus on cardio exercises that empower your lungs. It’s also wise to swim regularly so you can move confidently through the water.
Insurance is a MUST
We’re not an insurance company or an attorney, which is why we know you need both of those things if you’re going to be an underwater photographer (or any kind of photographer, for that matter!) Talk to your attorney about any underwater-specific clauses your contract should include, and work with a licensed insurer to limit your liability.
Here’s where you should start:
- Ask about a commercial liability policy that will properly protect your business
- Also consider a personal umbrella policy, which protects you individually in the event of a lawsuit
- Make sure your gear is insured—specifically against water damage
- NEVER shoot without a contract. Ever. Period. One of our attorney-created contract templates is a great place to start!

Elizabeth Blank
#5: How to edit underwater photos
The first time you photograph underwater, you’ll probably be shocked by how truly awful your photos look. Even a pro like Elizabeth acknowledges the depressing results you’ll get if you try to show your photos straight out of the camera.
“It doesn’t matter if you’re shooting with a GoPro, or an Olympus, or a beautiful, amazing camera like the Z6. There’s such a lack of clarity and depth to underwater images straight out of camera. You have to manipulate your underwater images in post.”
#ShootProofPRO Fact: At sea level, water is 784 times more dense than air.
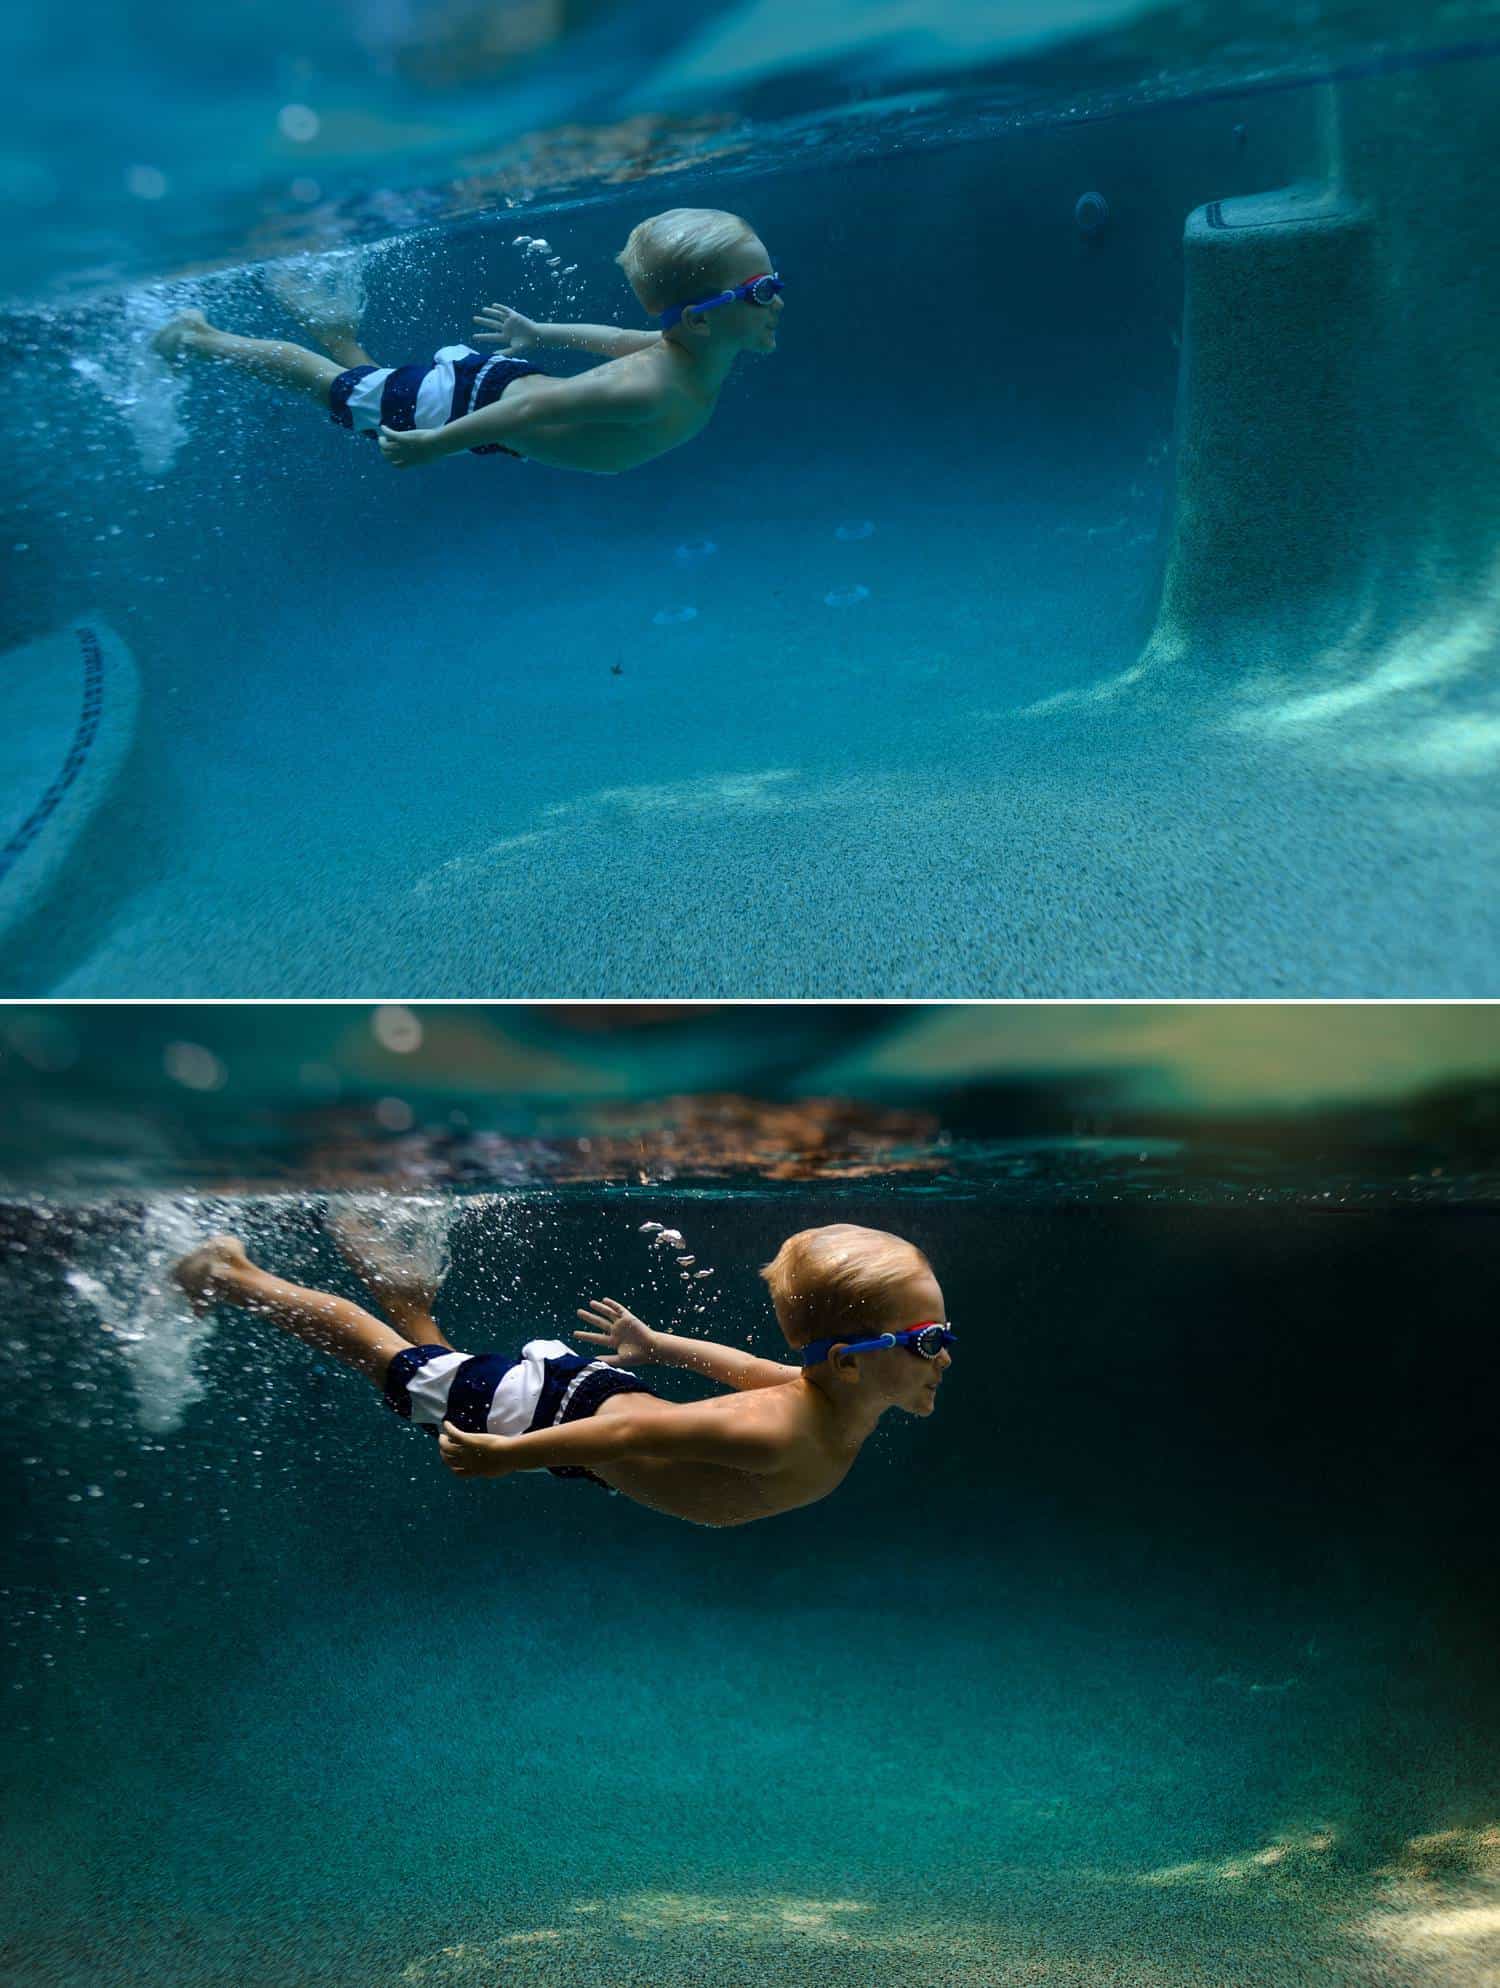
Before and after: editing by Elizabeth BLank
Cull your images
Elizabeth culls hundreds of photos down to the best of the best, which results in about 40-60 photographs that she’ll edit in Lightroom.
“It’s like the foundation of a house,” she says. “You can see what’s going to turn into a decent image or what’s just kind of trash.”
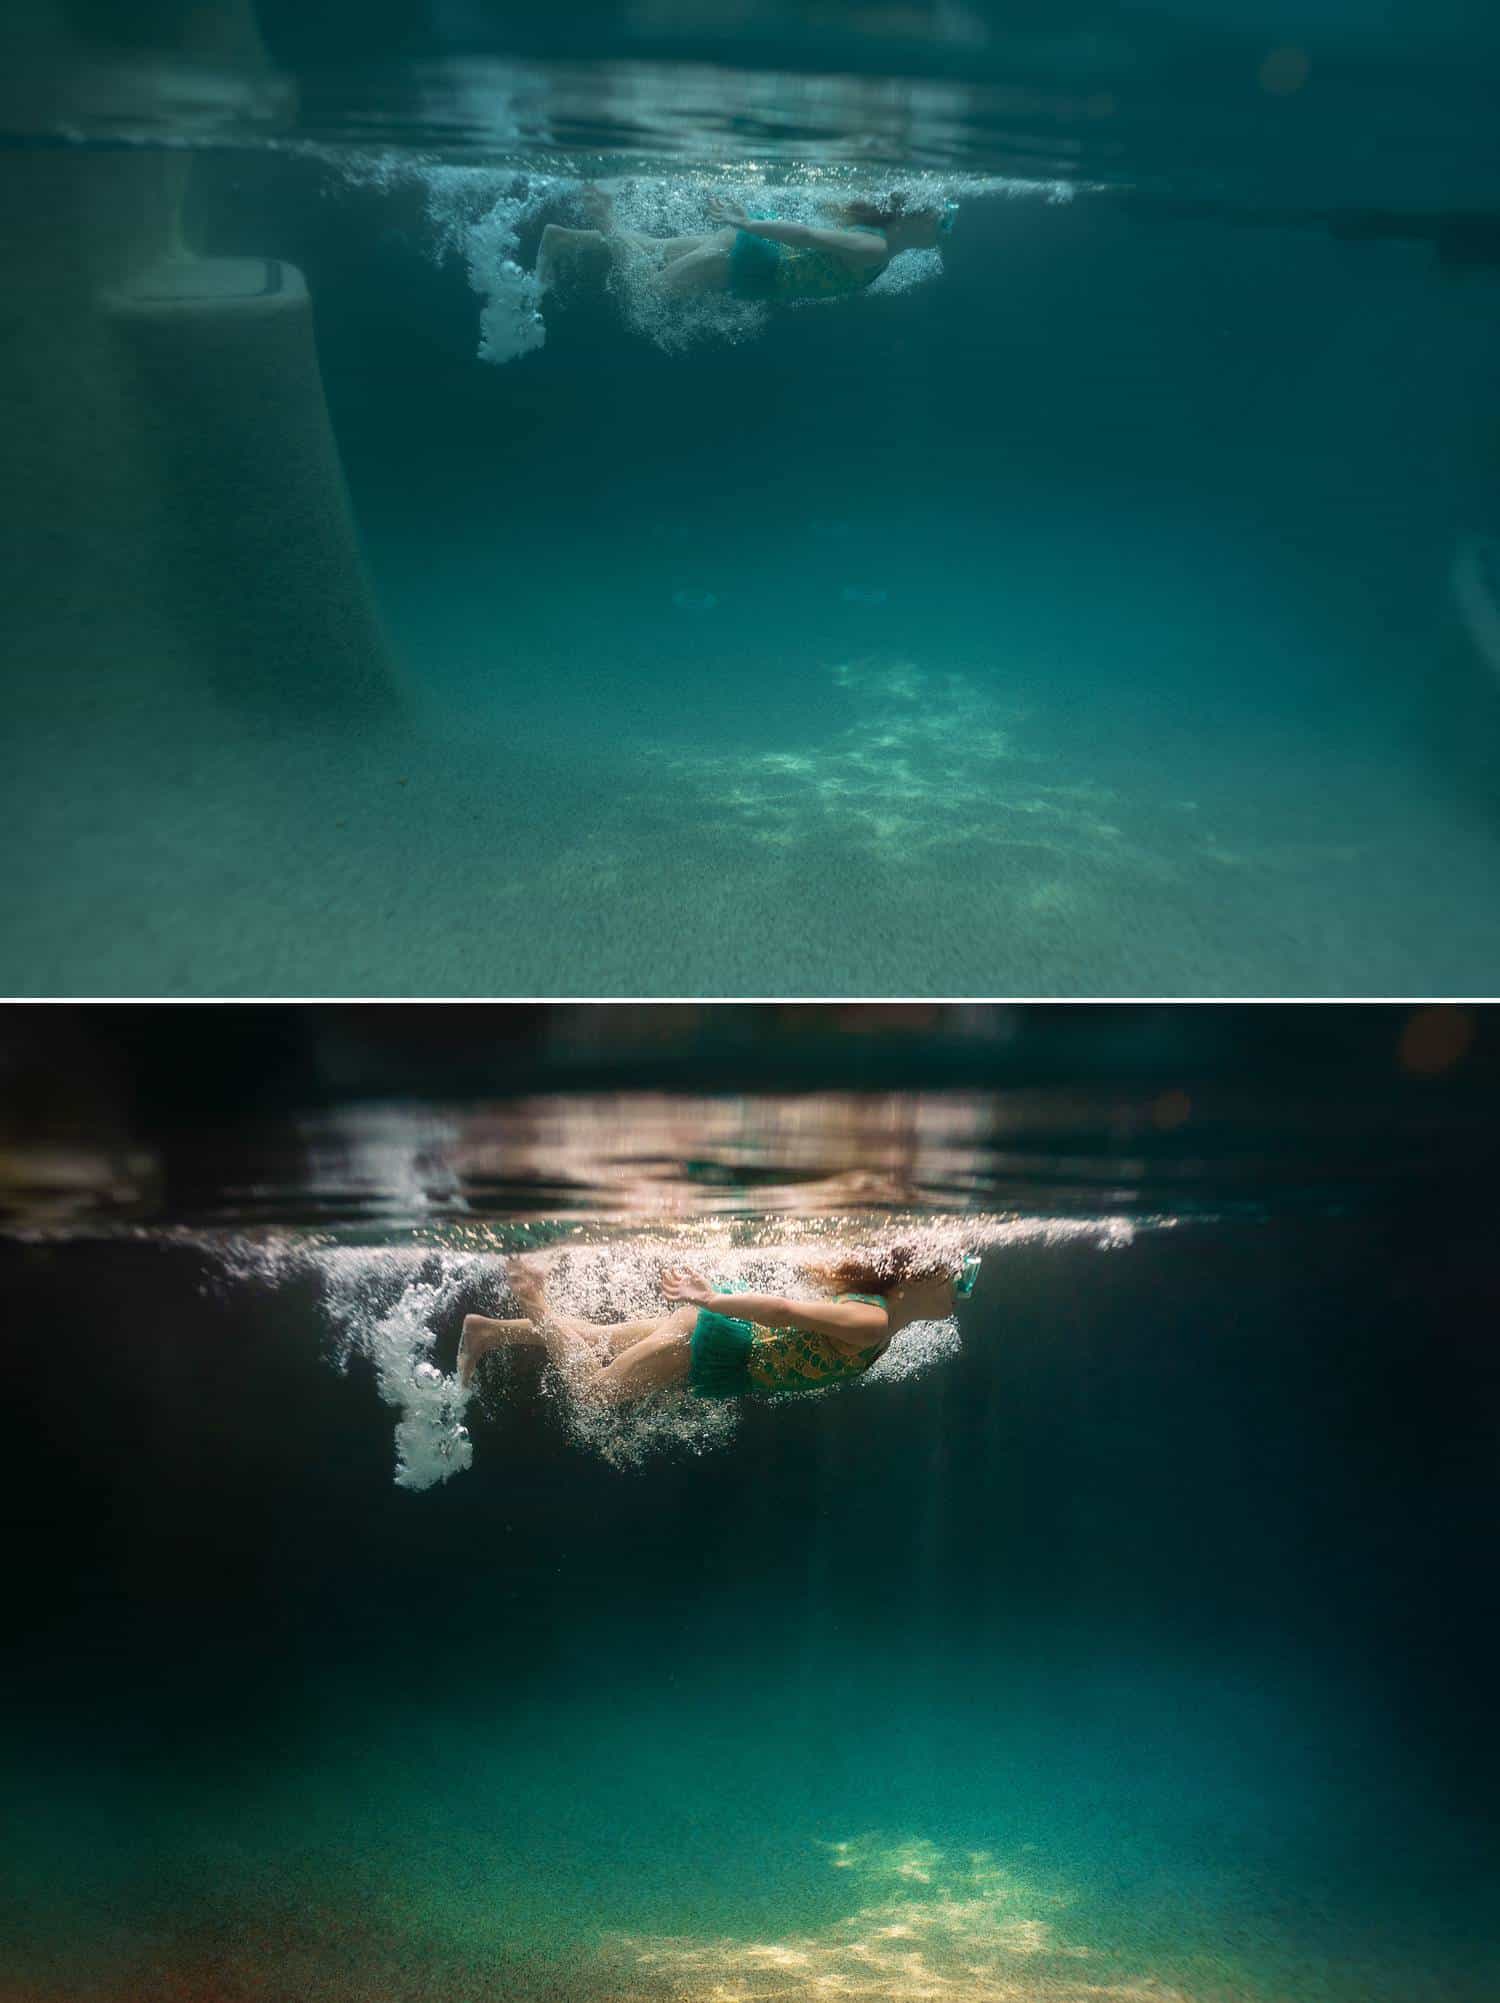
Before and after: editing by Elizabeth BLank
Finalize your post-production with Lightroom and Photoshop
Approximately 80% of Elizabeth’s post-production happens in Lightroom. After importing the RAW files, she begins her edit:
- Color: “If you look at the water bubbles near the surface, they are typically quite close to a neutral color. I’ll click on one of these neutral bubbles with the eyedropper tool to get the skin tones close to perfect, then I tweak from there using the HSL panel.”
- Contrast: “I typically bring my contrast almost all the way up to a hundred, because it’s just completely gone!”
The last 20% of Elizabeth’s post-production happens in Photoshop.
“I love the teal tones in pool water, and I try to retain those blues while also correcting the skin tone,” Elizabeth describes. “If I can’t do that in Lightroom, then I’ll pull the images into Photoshop and create a layer mask to get the skin tones where I want them without sacrificing the blue light.”
One of Elizabeth Blank’s ShootProof galleries
#6: Get your gorgeous images into your clients’ hands
The last step is usually the simplest: getting the finished photographs to the clients.
“I LOVE ShootProof,” Elizabeth raves. (And if you don’t believe us, watch her in the webinar below!) Elizabeth’s photographs go into individual, password-protected galleries where clients can shop, share, and download. Individualized permissions enable Elizabeth to control access to downloads, and product packages allow for larges sales totals.
Before you take on your first underwater client, take the time to establish a sales approach. The sales experience The Blumes have developed for their mini sessions is a brilliant way to help your underwater clients choose the right products for their homes.
Are you ready to dive in?
We’re here to help! Let ShootProof support your business with easy online contracts and invoices, beautiful client galleries, in-depth email automations, and affordable archiving so every image you’ve ever made is always right at your fingertips!
Written by ANNE SIMONE | Webinar by KAREN CLOUSE | Featuring ELIZABETH BLANK
Contributor