Watch & Learn: Step-by-step instructions on getting your clients’ ShootProof Favorites into Lightroom for additional editing and print prep. (Featuring: BRYAN STRIEGLER and ASTRAY PHOTOGRAPHY)
Time is one of the most valuable things we have, and I really don’t want to spend my whole life sitting at a computer.
I’ve been trying to improve my workflow for years, and I’ve managed to find some ways to speed things up. For about a year now, I’ve been using ShootProof to display, select, and deliver my photos, and it has made things much easier. There still has been one part of the process that drags on and is horribly boring: marking the client’s ShootProof Favorites back in Lightroom.
Photo: Astray Photography
Once a client has selected their Favorite photos, I have to go back into Lightroom and mark those files for editing. If I’m only dealing with 10-20 selected photos, it’s not a big deal. The problem comes when I’m dealing with a wedding, and it’s several hundred photos. It was taking me about an hour to mark 300-600 photos. I’m so thrilled to say I finally found two other ways that are much faster and easier, and I’m going to share them with you today!
Find Favorites By Searching (Lightroom Classic or Older)
I think we all fall into patterns of doing the same thing over and over again. For some strange reason, I never really looked for a faster way of marking the Favorites. Turns out, you can simply use the Search option in Lightroom to find the correct photos!
You can watch my total workflow here, or scroll down to see the step-by-step instructions:
#1: Prepare the Files
It all starts with naming the files. This needs to be done before you upload them to ShootProof. After a lot of experimenting and screwing up, I realized that you need to have several digits in the number of the file and no spaces. For example, if you type Photo 1 into the search bar, Lightroom will find all the photos with the “Photo” or “1″ in them – such as Photo 14. This doesn’t happen, though, if you have three or four digits and no spaces, like this: Photo-0001.
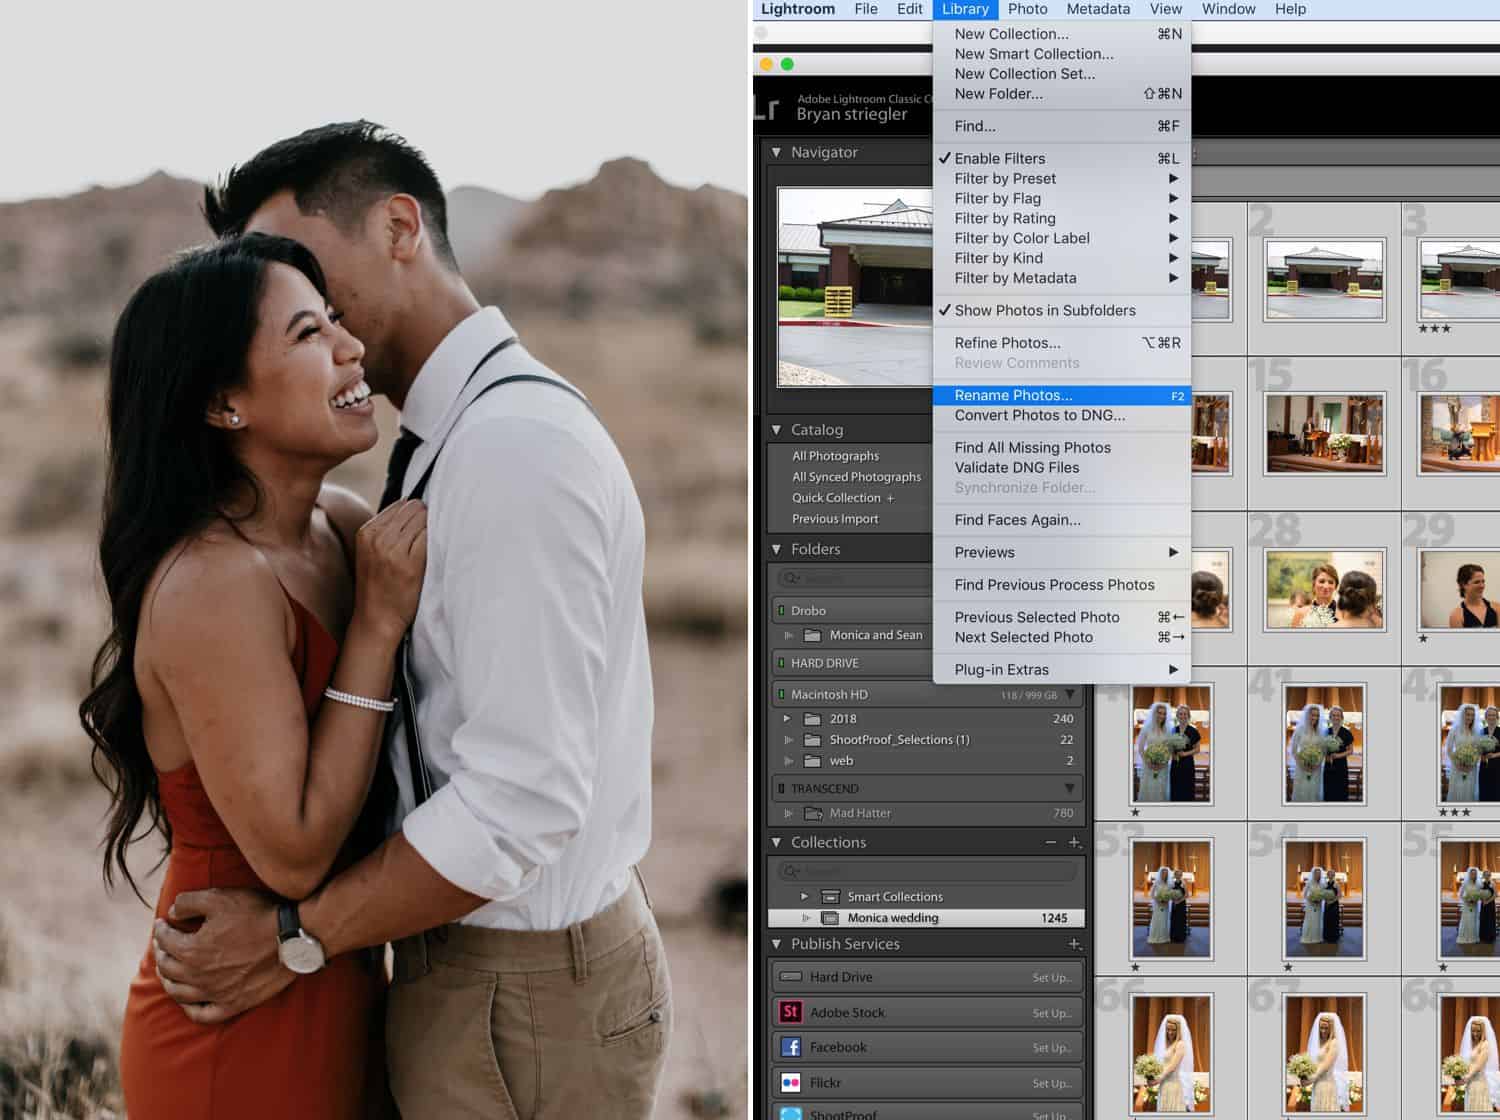
Left: Astray Photography | Right: Bryan Striegler
Pro Tip: Renaming & Easy Searching
Lightroom Option A: Do NOT Rename Your Files – EVER
- Leave the original file names intact (e.g., DSC_0001) when you export them from Lightroom
Pros: You won’t have to worry about duplicate file names, and you’re guaranteed that your RAW filenames always match your JPEG filenames.
Cons: Your filenames may not match the chronology of the images. For example, if you started shooting with file number DSC_9027, then ended the shoot on file number DSC_1284, the photos will appear out of order when sorted by filename.

Photo: Astray Photography
Lightroom Option B: Rename the Original Files
- In Lightroom, select ALL photos
- Go to Library > Rename
- Choose Custom Sequence from the dropdown
- Click Edit under the dropdown
- Next to Sequence, click the dropdown menu
- Change the filename format to 0001 and click Done
- Enter a new name for the files (e.g., Amy_Alex)
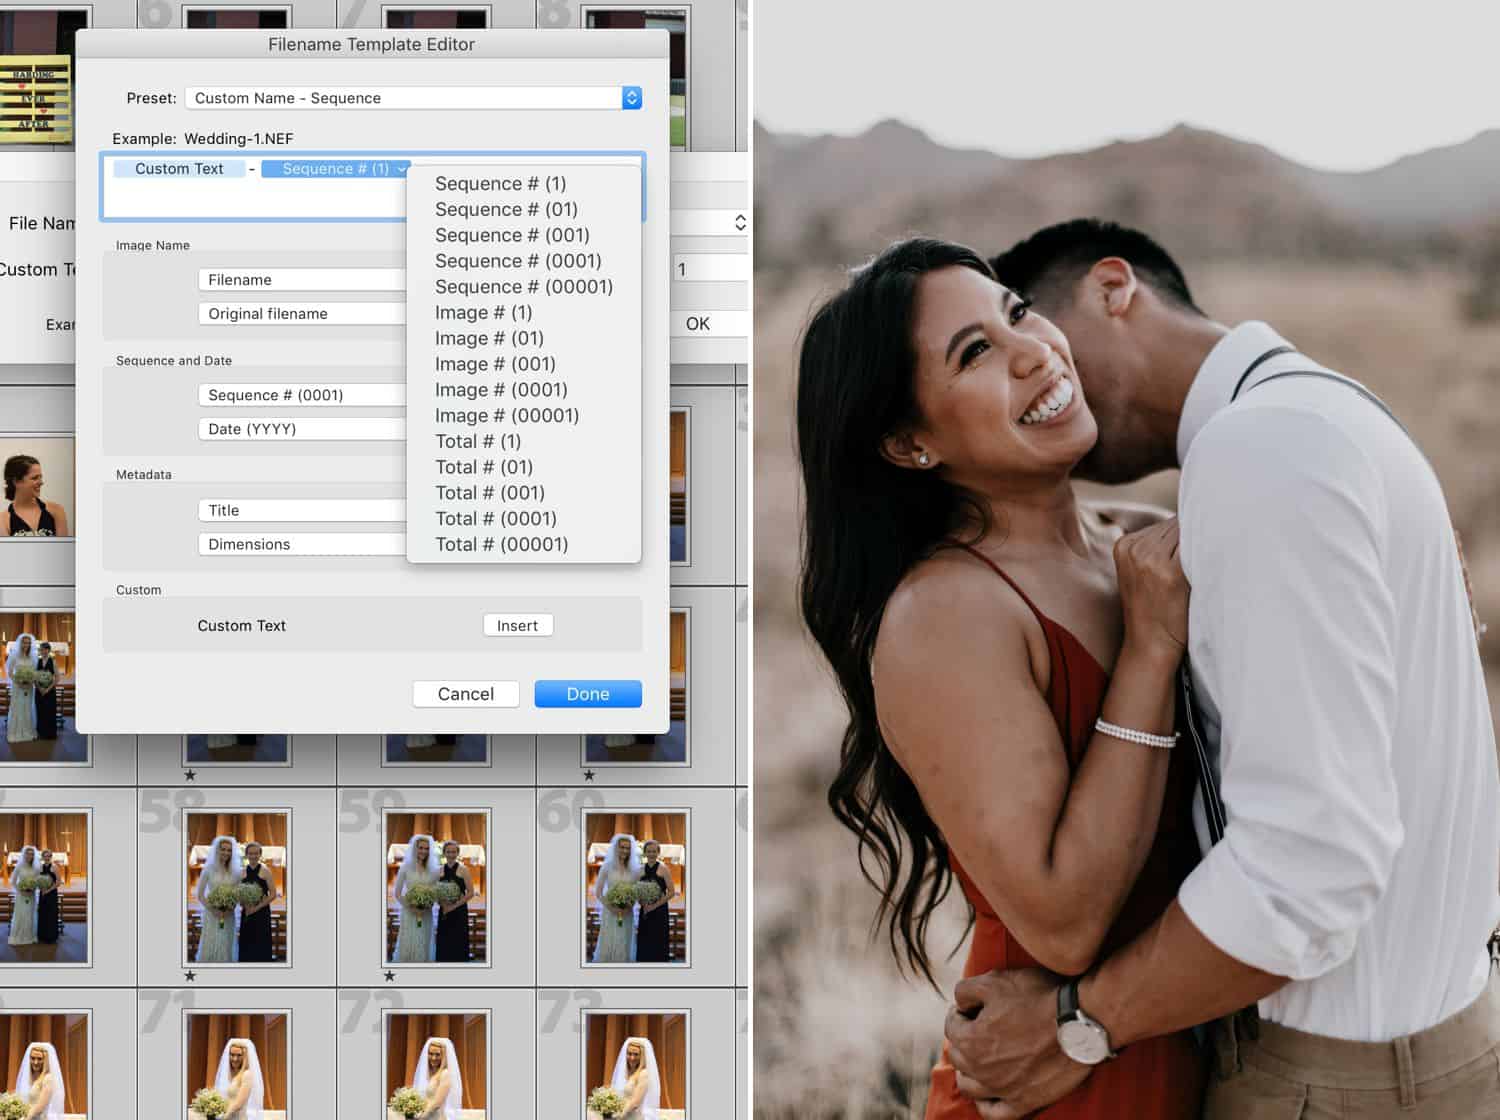
ShootProof Favorites In Lightroom: Bryan Striegler | Photo: Astray Photography
#2: Find Favorites In ShootProof
Next, you need to find your client’s Favorites.
- In ShootProof, go to Photos > Galleries, and select Actions beneath the desired Gallery
- Choose Gallery Visitor Report, and select the visitor whose Favorites you want to see
- Scroll to the bottom of the Favorites page until you see the list of Favorites’ filenames
- Select and copy this list

Photos: Astray Photography
#3: Locate the Favorites In Lightroom
Now, we will use that copied list to quickly find the Favorite photos in Lightroom.
- In Lightroom, visit the Library tab, and make sure you are in Grid View (click the G key)
- At the top of your screen, you should see: Text, Attribute, Metadata, and None. (If you don’t see these, press the “” key.
- Select Text, and a new field will appear.
- Change Contains All to Contains, then paste the list you copied from ShootProof into the search bar.
Photos: Astray Photography
Pro Tip: Troubleshooting Lightroom
It might take some time for the images to show up. I had Lightroom freeze up a few times, so you might paste half of the list and then do the second half afterwards.
You should now only see the images whose filenames match the Favorites’ filenames. (A quick way to check to see if it worked is to look at the total number of photos at the bottom of Lightroom. That number should match the number of Favorites in ShootProof.)
In Lightroom, click Command+A to select all visible images (the Favorites), and mark them however you choose – with a color label, a flag, or a rating. Whatever works for you!

Photos: Astray Photography
When the Search Method Isn’t Working
The search method works great in certain situations, but it’s not perfect. I’ve run into several issues with it. The first big issue that we mentioned earlier is files with only a few digits or spaces. That will screw up the whole process.
So what do you do if the numbers are off, or it just isn’t working, or if you had already renamed the files? I promised you a second solution for sorting, so let’s look at how to do it an alternative way.
Photos: Astray Photography
Find Favorites By Downloading & Labeling
The Search option above is fast and easy, but some versions of Lightroom no longer support that method. Here’s how to locate your clients’ ShootProof Favorites in Lightroom by downloading, importing, and marking. Here’s that complete workflow:
#1: Download Favorites from ShootProof
This method is quite different from the Search approach. First, we need all of the image files our client added to their ShootProof Favorites.
- In ShootProof, go to Photos > Galleries, and select Actions beneath the desired Gallery
- Choose Gallery Visitor Report, and select the visitor whose Favorites you want to see
- Click Download All from the top right corner of the visitor’s Favorites screen. Choose Submit Request from the pop-up box.
- Within a few minutes, you should receive an email with a link to download the Favorites. Click on the link, download the ZIP file to your laptop or desktop, and double-click to open it. You should see only the Favorites the client selected.

Photo: Astray Photography
#2: Import to Lightroom
Now it’s time to Import these JPEG Favorites into Lightroom.
- Open the Lightroom Catalog containing the original RAW files.
- From the Library tab, click Import. (NOTE: if the original files are JPEGs, be sure to uncheck “Don’t import selected duplicates.” This will allow you to import images with the same filename and extension.

Photos: Astray Photography
#3: Mark the Imported Favorites
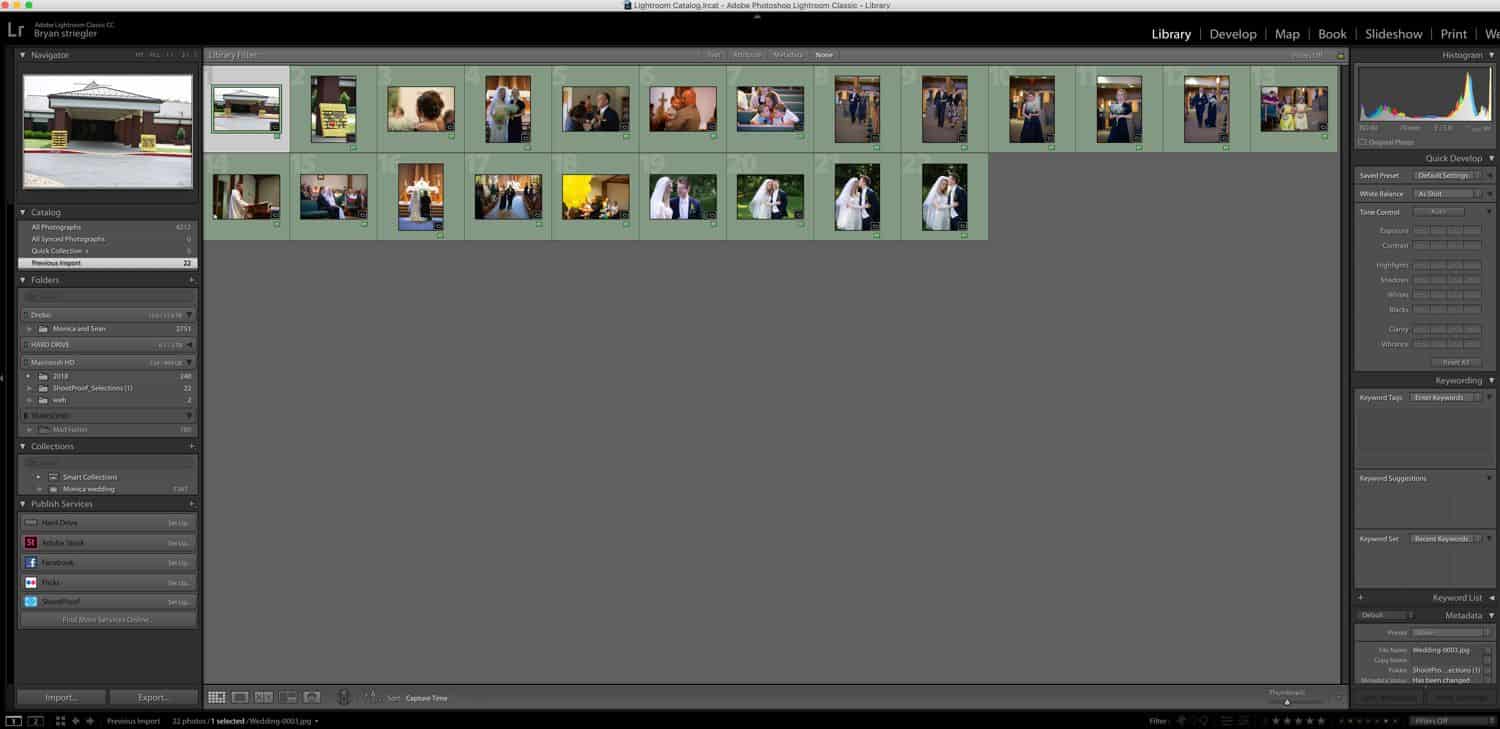
After you’ve imported the images you downloaded from ShootProof, you’ll need to mark them so you can quickly find them later. Be default, Last Import will be selected in the left-hand sidebar, so you can simply select all (Command+A) to highlight these newly-imported images. You can rank them or flag them, but I think the best method is to apply a color label. I suggest something that sticks out, like red.
ShootProof Favorites In Lightroom: Bryan Striegler
#4: Locate the Associated RAW Files
Right now you should only be seeing the new images you imported, but we need to see the rest of them. You’ll want the old RAW images and the new color coded jpegs in the same place.
- Click All Photographs from the left-hand sidebar.
- If you have photos from another shoot in this Catalog, you’ll want to move the shoot you’re working on into a new Collection. To do this, select all the images from this shoot. From the Collections dropdown in the left-hand sidebar, click the “+” icon, and choose Create Collection. Make sure to select Include Selected Photos.
- From the bottom toolbar, choose Sort > Capture Time.
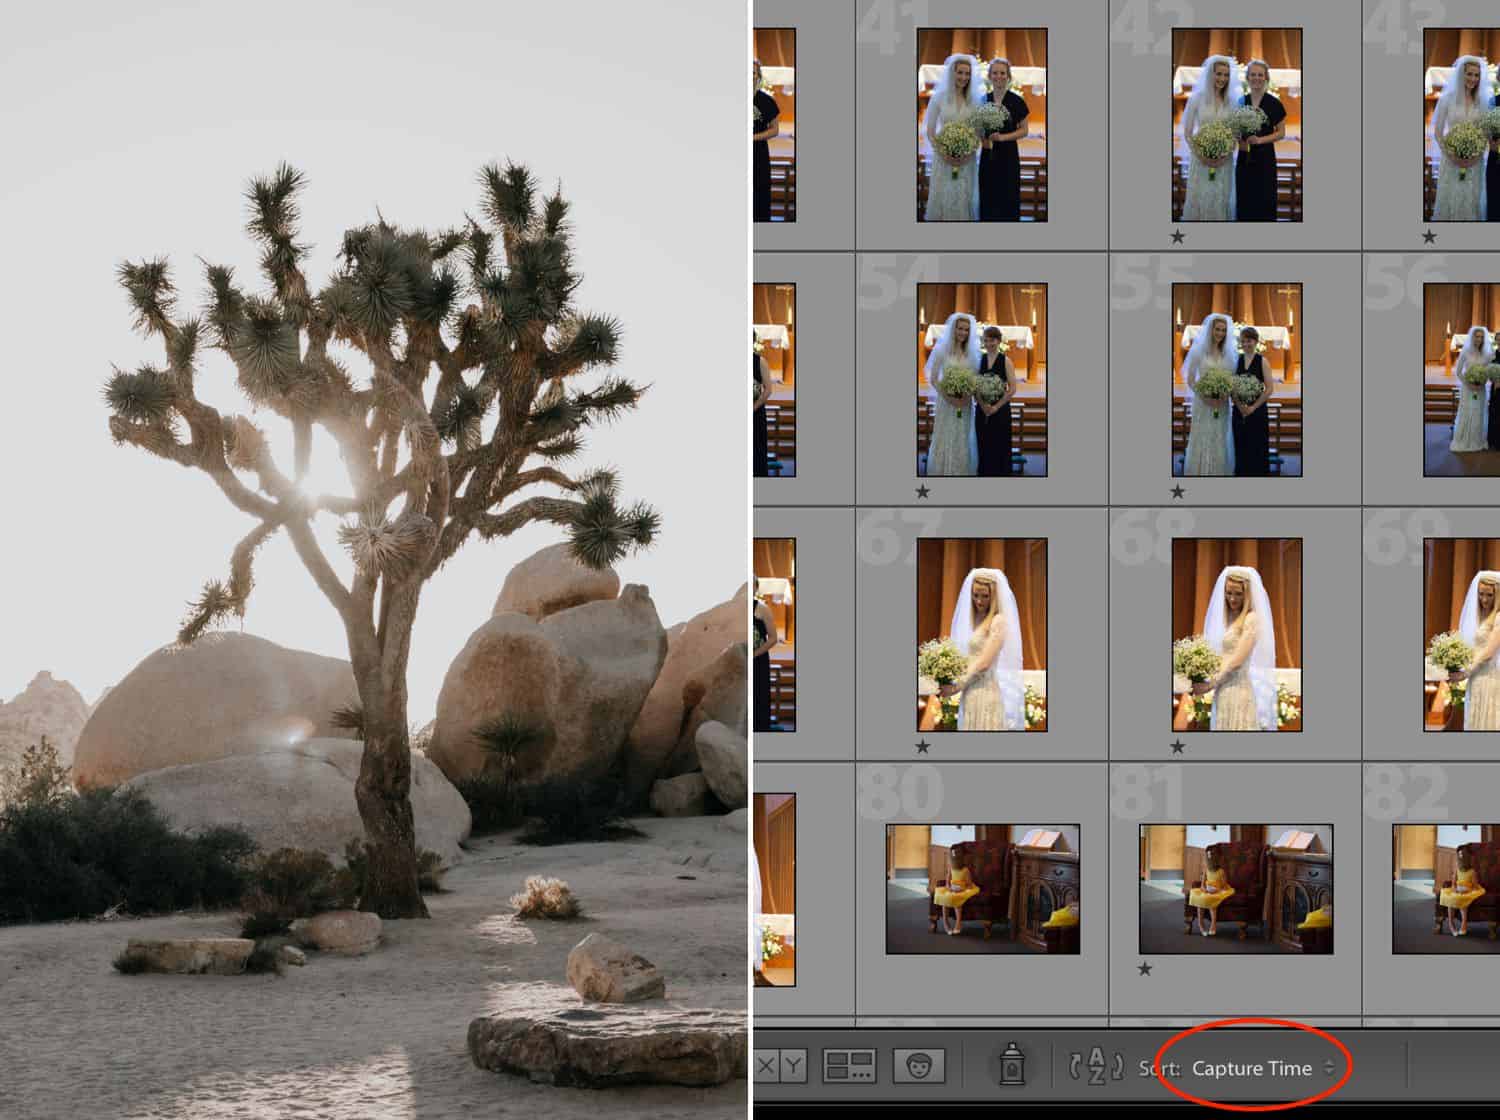
Photo: Astray Photography | ShootProof Favorites In Lightroom: Bryan Striegler
- Next, in Library view, scroll through the photos and look for the ones with your previously-applied, rating, flag, or color label.
- Beside each marked JPEG from Favorites, you’ll see the original RAW file.*
*NOTE: The original file should appear directly to the left or right of the imported file, but make sure you check the file numbers. There were a few instances where the file was actually further away.
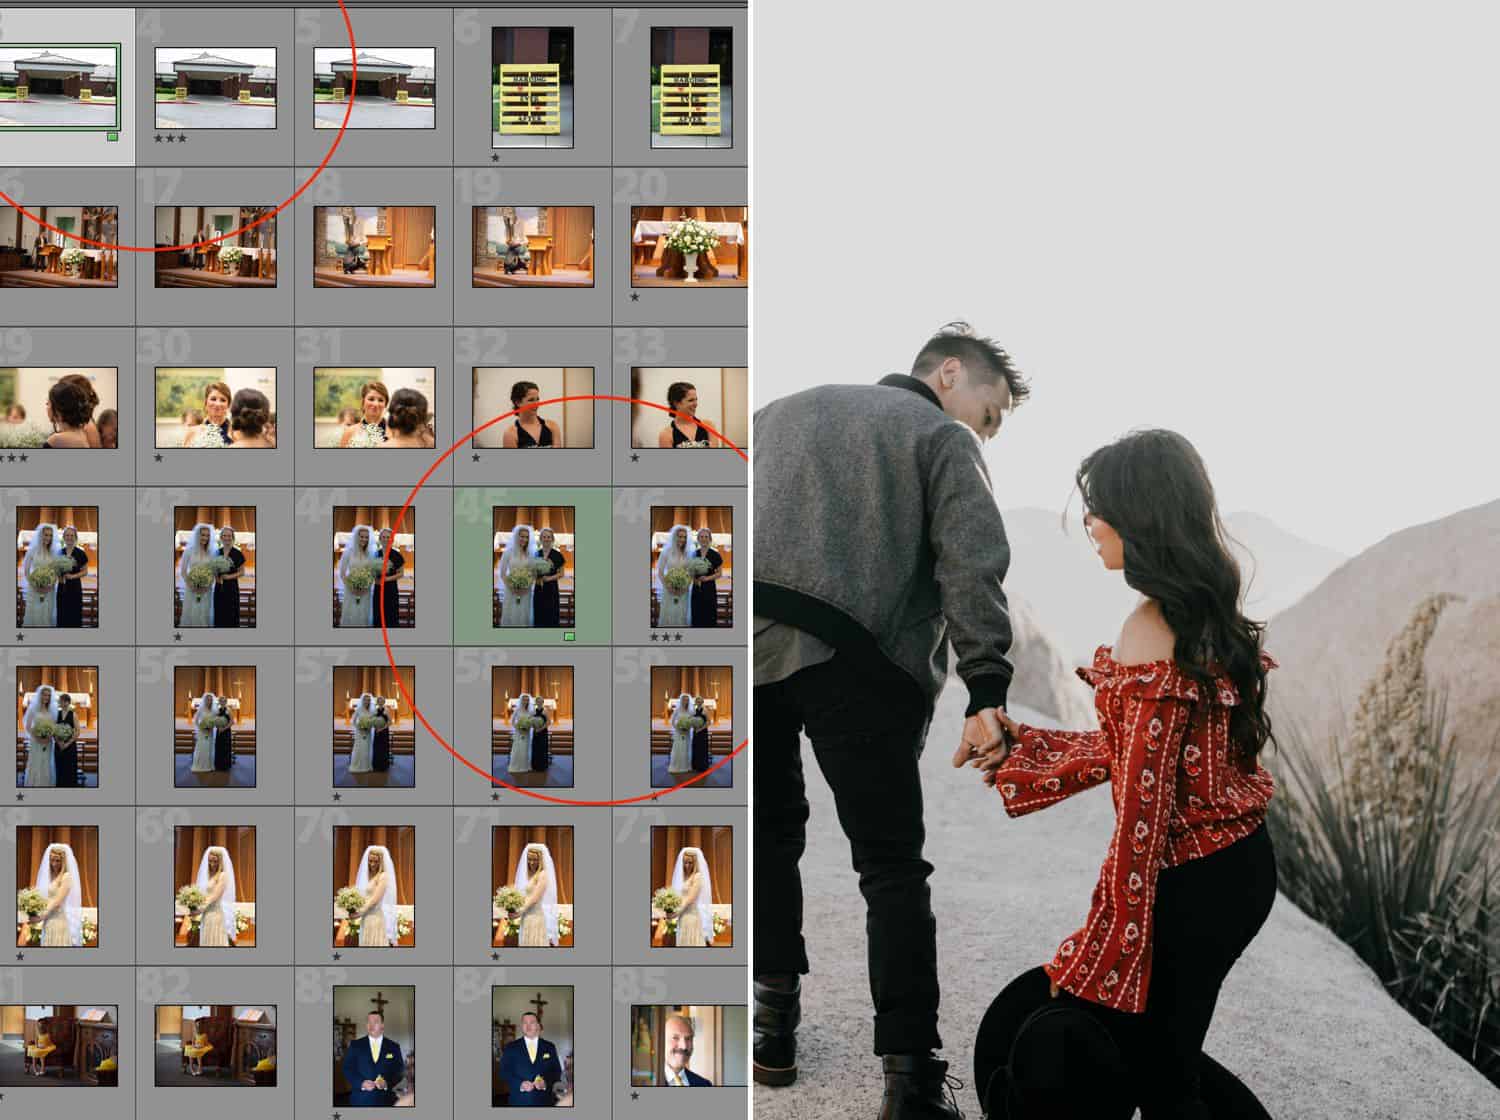
ShootProof Favorites In Lightroom: Bryan Striegler | Photo: Astray Photography
- Mark the original file with a different rating flag, or color label, then do the same with subsequent Favorites matches. When you’re done, simply filter down to only the original images you’ve labeled, and get to work!
One Whole Hour, All To Yourself
We all want to save time and make things easier. This new process of marking my client’s selections in Lightroom from ShootProof saves me up to 60 minutes for each wedding. That’s one hour I could spend working on something else, playing with my kids, or even taking a nap. Getting accustomed to this process might take some time, but in the end it will be worth it.
If you have any other time-saving tips, please share them in the comments below!
Written and filmed by BRYAN STRIEGLER | Photography by ASTRAY PHOTOGRAPHY via TWO BRIGHT LIGHTS


