These portrait posing tips are perfect for mini sessions! First-time photographers and pros alike will improve their portraits with seven simple ideas. (Photographs: LANA TAVARES, 222 PHOTOGRAPHY)
Tips for Posing for Portraits
When it comes to portrait photography, your goal is to show the ‘best side’ of your subjects by guiding them through poses, adjusting angles and stances as you shoot. Using the posing ideas below, you’ll have unique ways to make your clients look their absolute best!
#1 Mind the Lighting
As with other types of photography, lighting plays a crucial role in the visual impact of your portrait poses.
When shooting portraits, you should position your subjects in a way that light skims across them. If the light does not fall across their faces or their clothes, you won’t be able to highlight subtle details and textures.
You can consider waiting to shoot in ‘golden hour,’ which is the 1 to 2-hour timeframe after sunrise or before sunset. The sun is low during these times, forming contrasting shadows that give you soft, ethereal lighting that’s great for portraits.
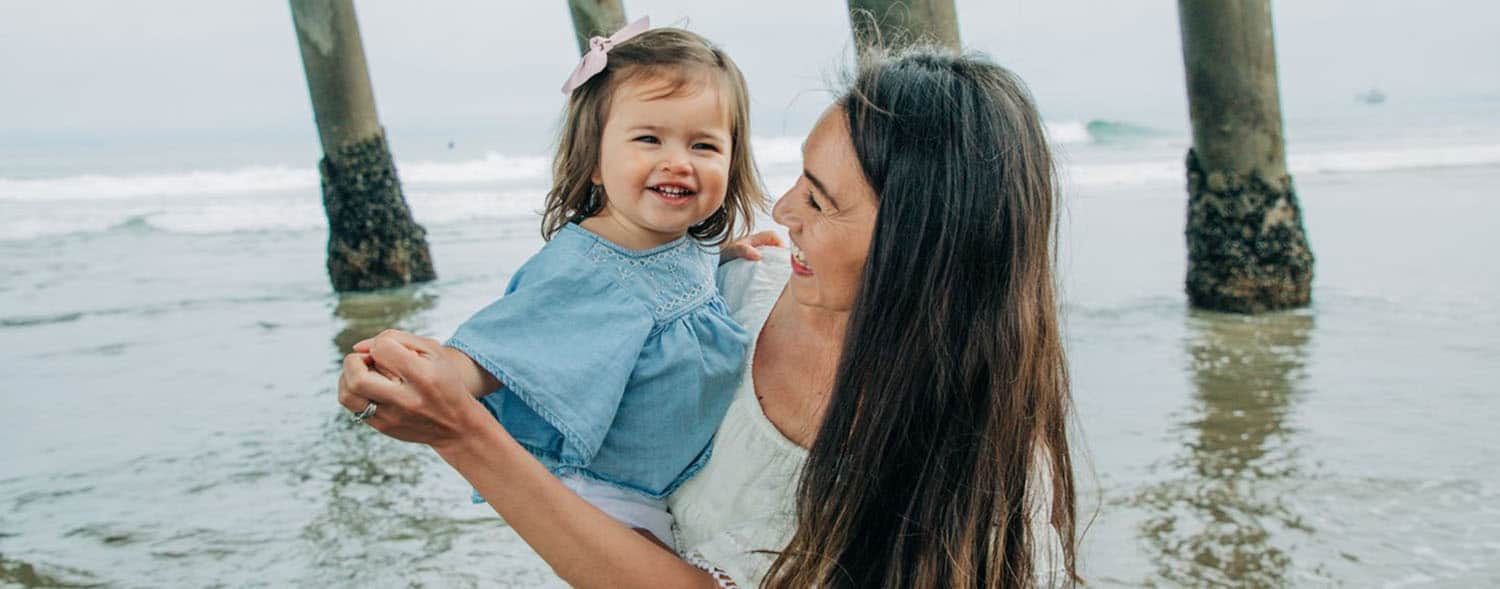
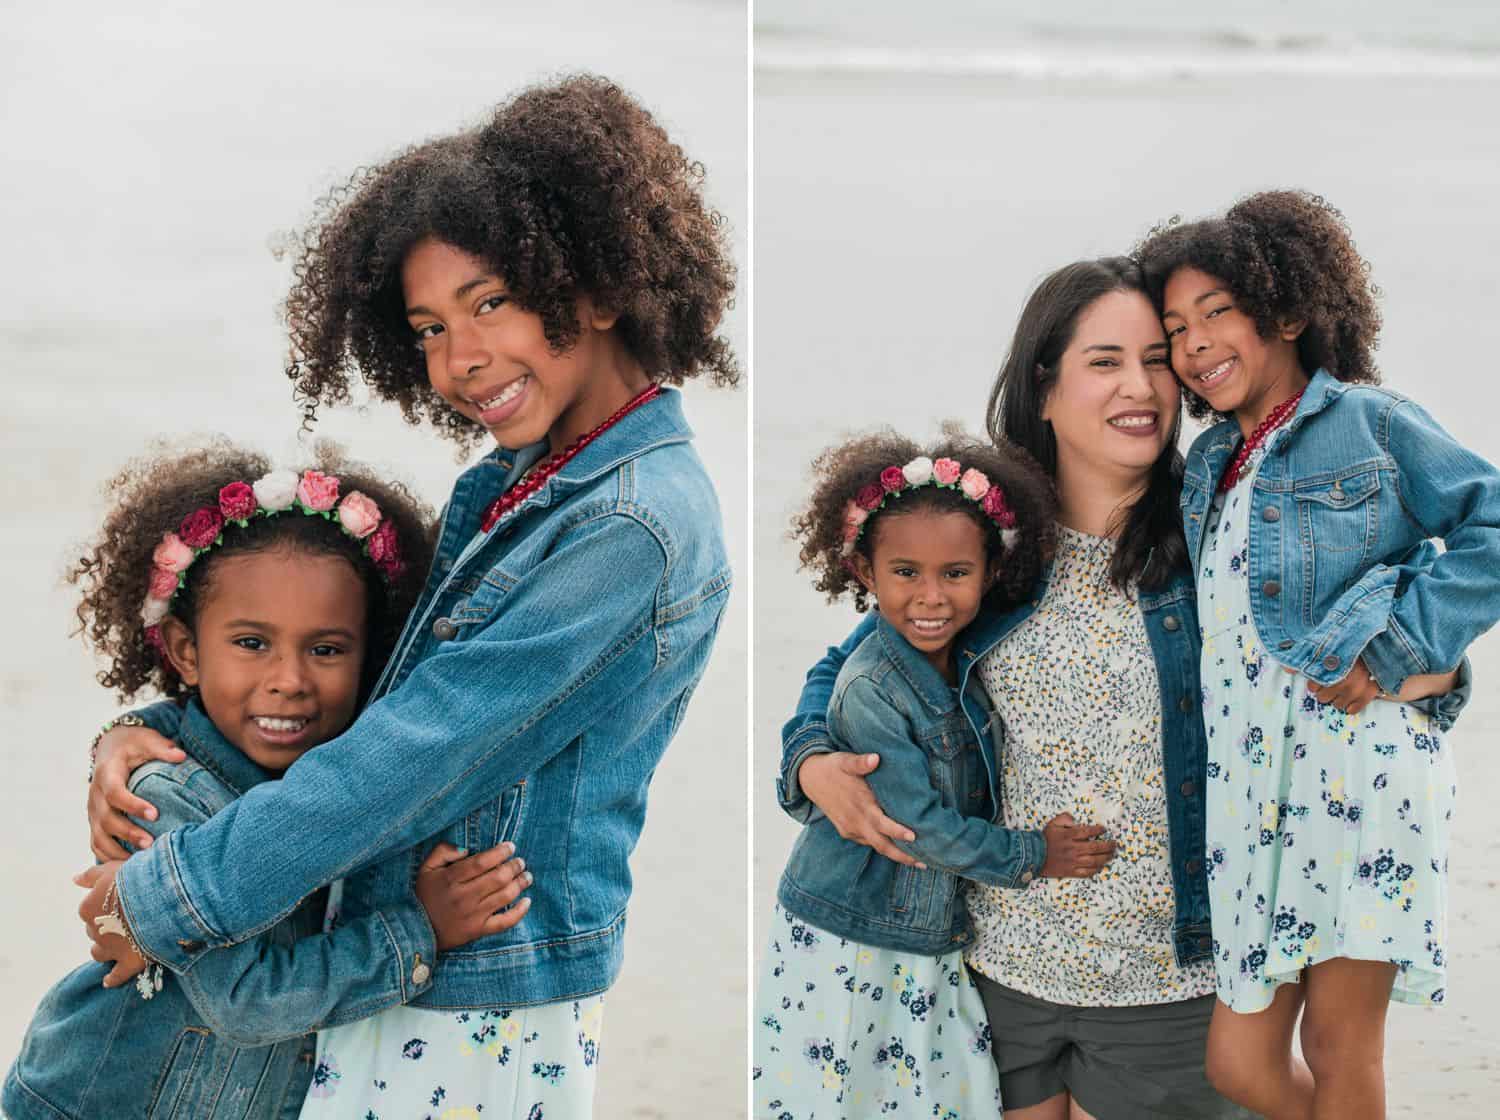
#2: Encourage Interaction
Keep the energy up during your shoot by encouraging your clients to interact with one another. Kisses, cuddles, hugs, and hand-holding all contribute to the natural, relaxed vibe of the photo below. Direct your clients to “snuggle as close as you can,” “hug dad’s leg,” or “hold mom’s hand.” You can also tell the family, “everyone look at mom! now everyone look at brother!”
Settings: EF100mm f/2.8L lens at f/5, 1/2000,” ISO 250

Portrait Posing Tips with Lana Tavares, 222 Photography
#3: Change Up Your Lens or Shooting Distance
Show off the landscape or great architectural elements with a wider lens or by shooting from a distance. Then move closer in or switch to a telephoto lens for a bokeh-rich frame that’s focused on your clients’ faces. In the photos below, Lana simply walked a few feet closer to her clients to make a close-up shot with her fixed 100mm lens.
Left Photo Settings: EF100mm f/2.8L lens at f/2.8, 1/3200″, ISO 250
Right Photo Settings: EF100mm f/2.8L lens at f/2.8, 1/1600″, ISO 250
Portrait Posing Tips with Lana Tavares, 222 Photography
#4: Get Every Face on the Same Plane
No, we’re not talking commercial airliners. To get beautiful bokeh and tack-sharp faces, pose your clients with their faces on the same plane – each person at the same distance from your camera lens. As demonstrated below, this ensures everyone is in-focus, and still enables you to choose a low aperture number.
Settings for Both Photos: EF100mm f/2.8L lens at f/5.6, 1/250″, ISO 250
Portrait Posing Tips with Lana Tavares, 222 Photography
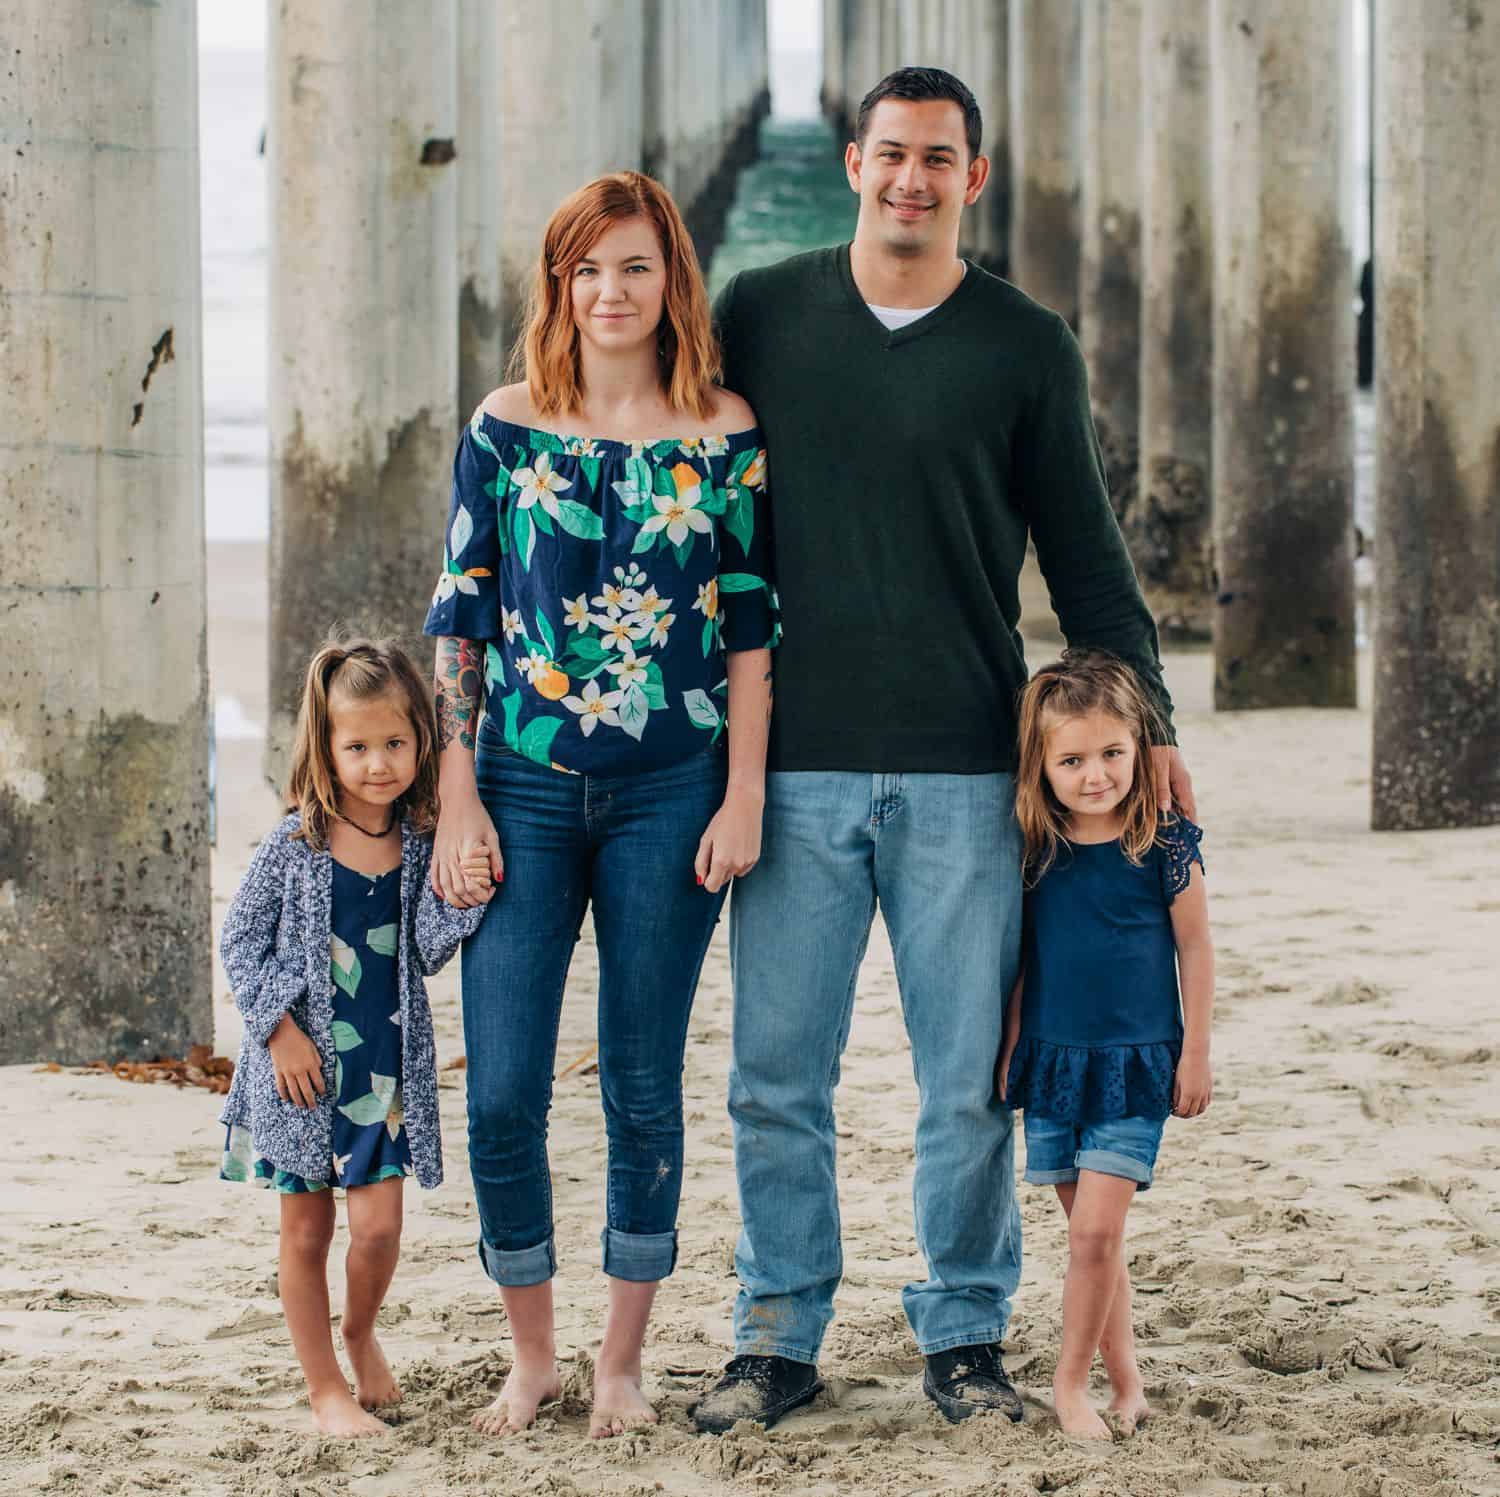
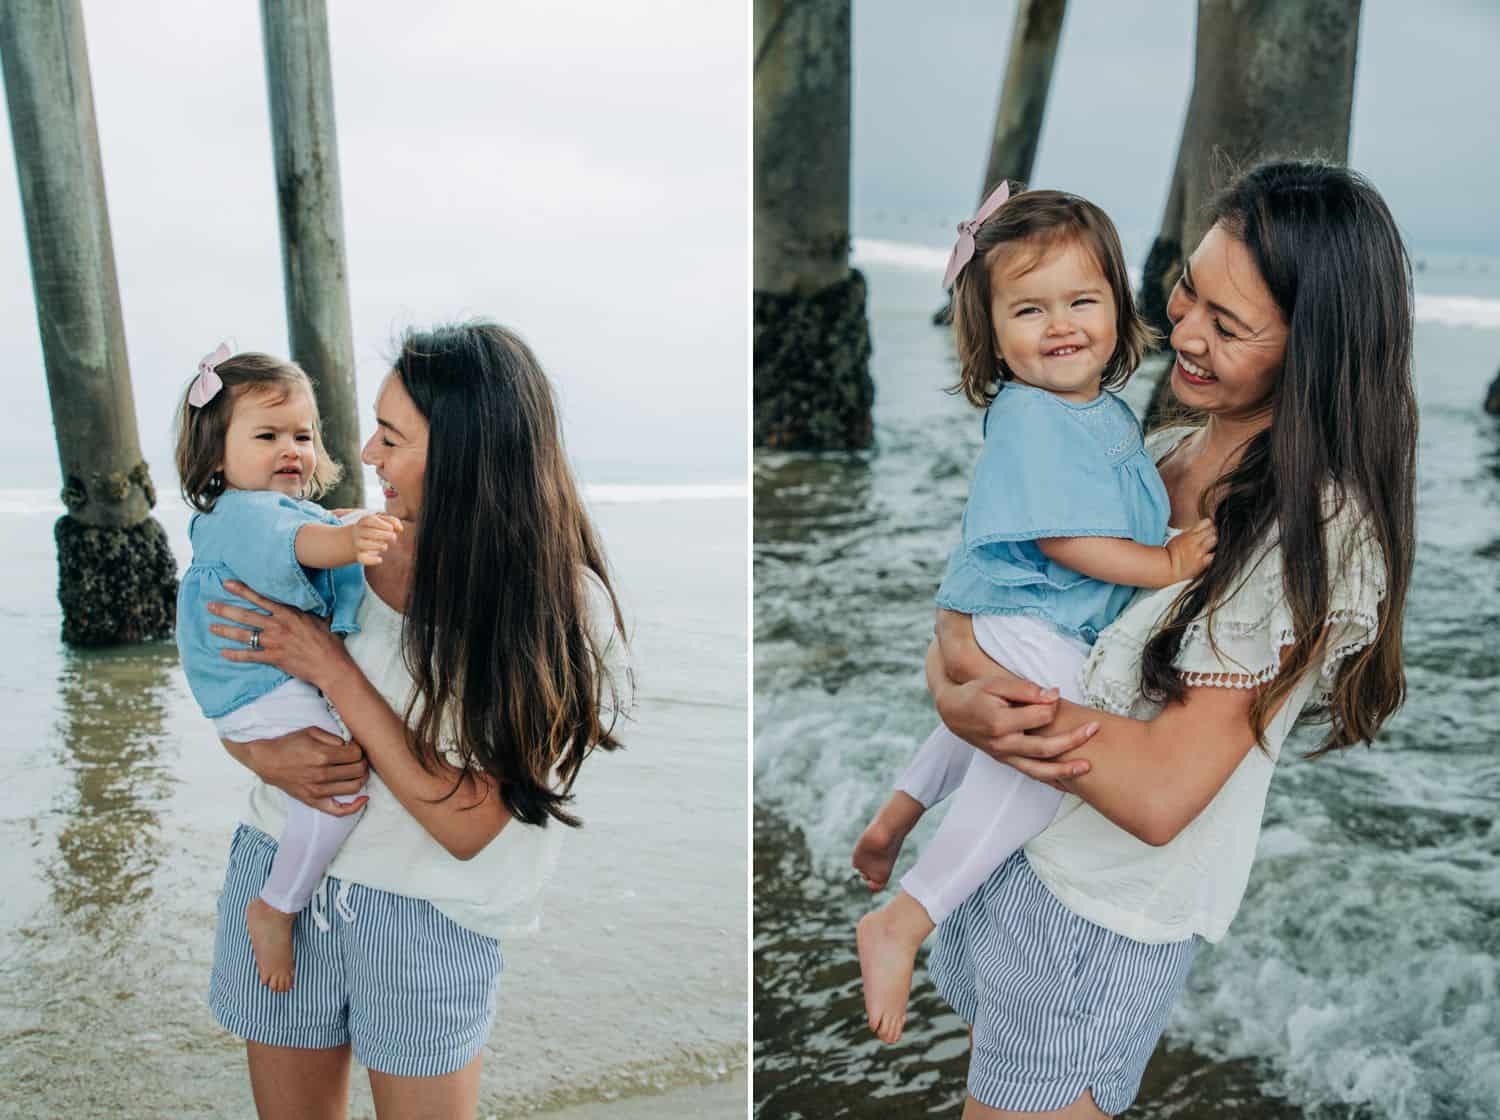
#5: Choose a Backdrop with Depth
Families with young kids can be hard to pose with any precision. If you’re shooting against a backdrop with depth, however, it won’t matter if the best you can wrangle is a simple line-up photo. Not everyone has access to seaside piers with incredible columns, of course. Consider photographing in a heavily-wooded forest, or on a shady street with buildings in the background. These added elements will keep the photograph interesting without the need for intricate posing.
Settings: EF100mm f/2.8L lens at f/5.6, 1/160″, ISO 250
Portrait Posing Tips with Lana Tavares, 222 Photography
#6: Don’t Stop Clicking
If your first picture doesn’t capture the moment you were aiming for, keep shooting! A kiddo’s happy smile can vanish in an instant, so keep your shutter clicking until you know you’ve nailed the perfect photo. Remind parents to keep a smile on their face, so that everyone looks their best when you finally get their child to smile.
Left Image Settings: EF24-105mm f/4 lens at f/4.5, 1/200″, ISO 100, 24mm focal length
Right Image Settings: EF24-105mm f/4 lens at f/4.5, 1/400th, ISO 200, 50mm focal length
Portrait Posing Tips with Lana Tavares, 222 Photography
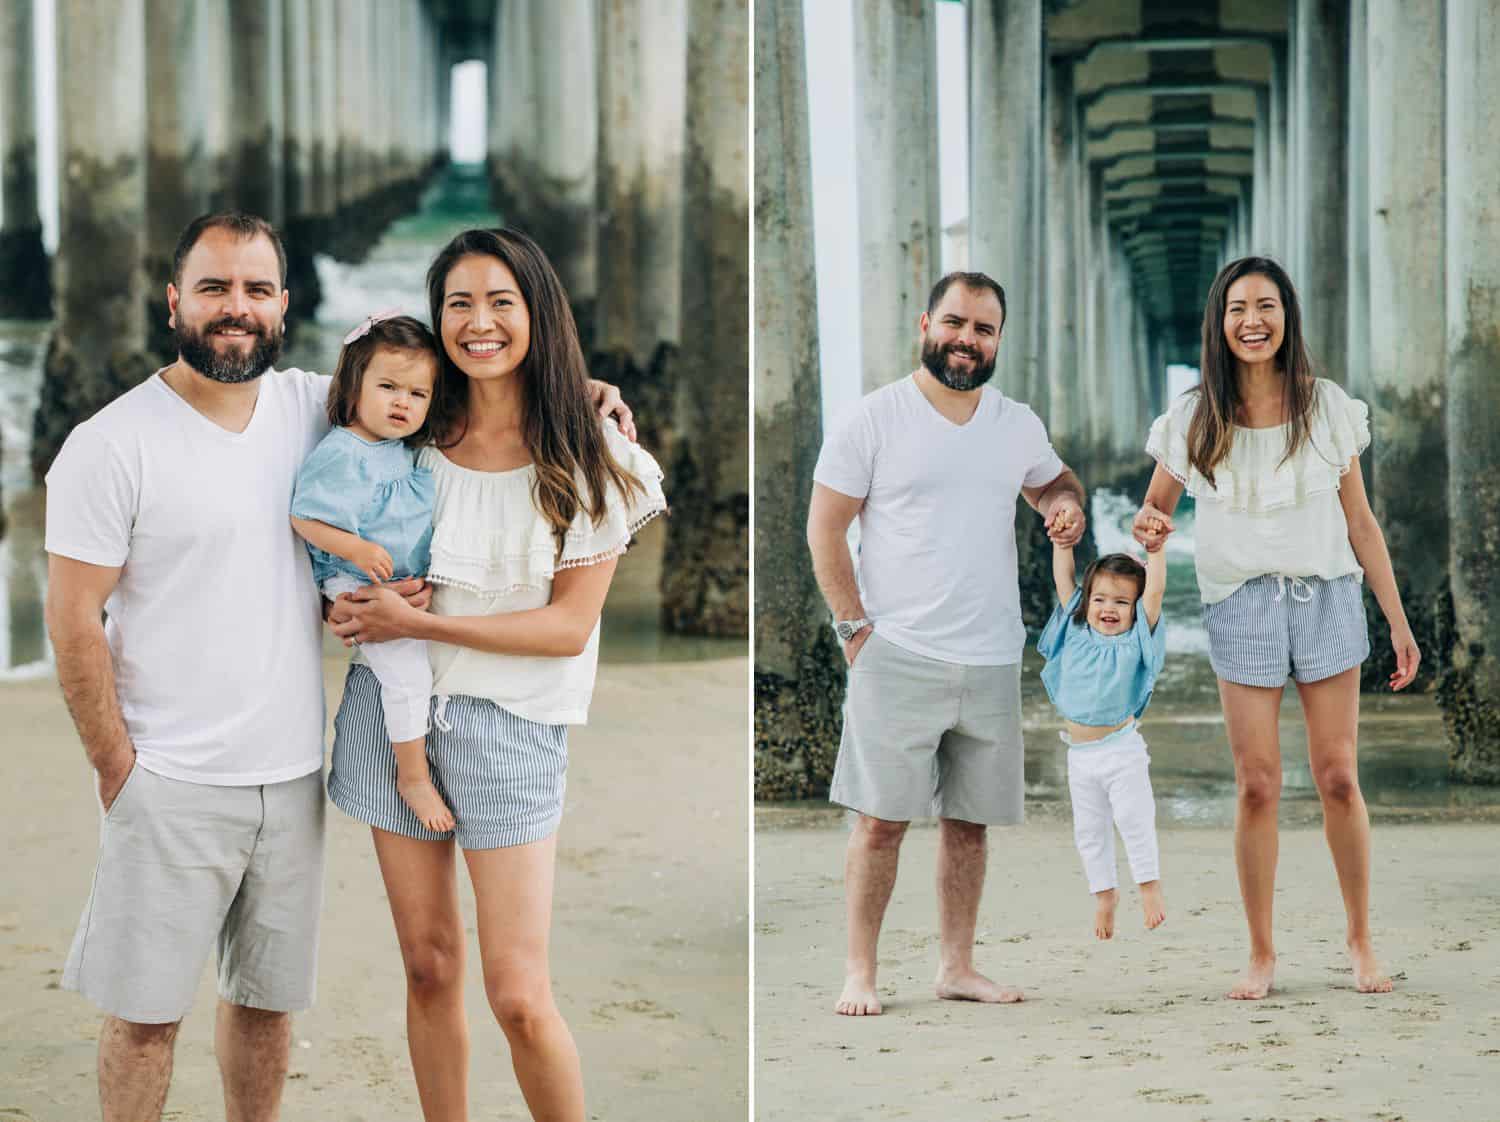
#7: Geometry is Your Friend
When planning a pose, think back to geometry class. In the picture below, the family is placed in a triangle shape. This pose creates a sense of balance that will look beautiful framed and hanging on your client’s wall!
Settings: EF100mm f/2.8L lens at f/5.6, 1/125″, ISO 250

Portrait Posing Tips with Lana Tavares, 222 Photography
#8: Line them up!
Some clients don’t know what to do with their arms, and they’ll awkwardly press their elbows against their torso or hide their hands behind their back. When this happens, their body appears one-dimensional. And that’s definitely not flattering!
When your clients feel nervous or shy in front of the camera, they tend to tuck their arms and hands straight down. As a result, their arms look bigger than normal – nobody likes that look!
Banish this look gently by incorporating diagonal lines. You can accomplish this through gentle posing!
- Ask your client to put their hands on their hips or inside pockets. Those subtle tweaks add a bit of confidence to the pose, while avoiding making the subject look stiff. Likewise, this leaves a visual space around the waist, extending the subject’s midsection.
- If they feel self-conscious about their arms, your goal is to help them look (and feel) slimmer by shifting their arms. Ask them to lift their arm a few inches so it appears like their arm is floating.
- Keep the line between the forearm and the body at an off-vertical angle to make the pose look more natural and dynamic.
- If your client is seated, subtly angle their body toward the light source to ensure their face is illuminated. Then, pivot their body slightly away from the camera to simulate a slim upper body shape.
#9: Pose the Hair
What’s that? Yep, posing your client’s hair is important too! This is especially true for men and women who have longer hair. Did you know, hair is one of the first noticeable elements in portraits!?
Make sure that you can still get a clear view of the subject’s face when you use these styling techniques:
- Hair in front of the shoulders
- Hair behind the shoulders
- Hair behind one shoulder, then some in front of the other shoulder
- Hair all on one side
- Styled-up hair
#10: Do the Head Tilt
When a client stands straight and looks directly at the camera, you may see excess skin underneath their chin– while there’s nothing wrong with this, clients will notice their “double chin” and call it out in photos. Be proactive by posing your subjects in ways that reduce this!
Guide your client in stretching their forehead forward and down to pull the skin around the neck tightly and eliminate the double-chin effect.
If the person isn’t facing forward, have them turn to the side. In this way, you can still include both eyes in the frame even if you’re not getting a full profile.
Ask your client to shift their chin forward, yet make sure that their nose doesn’t appear too prominent. While this can be tricky, your client will thank you for making them look fabulous!
#11: Keep an eye on the eyes!
Eyes are the most striking feature in a photo. They’re magnetic! Your client likely looks directly into the camera in most photos. For variation, you can instruct them to look off toward the horizon for a contemplative look.
Remember, though, don’t simply tell them to “look up!” Rather, ask them to focus on an object behind or beside you so you have more control over their eye line. This also gives you more ways of tilting their head.
Just make sure that you can still see the iris and white of their eyes.
#12: Shift the Weight
As the photographer behind the camera, you can see if the subject’s pose looks flattering or not. Your subject may consciously put weight on a back leg, causing their body to lean away from the camera.
Make sure to catch this, and guide your client in leaning closer to you or standing up straight instead. You can also ask them to lift their hip nearer to the camera so that you can break the horizontal line using their hip bones.
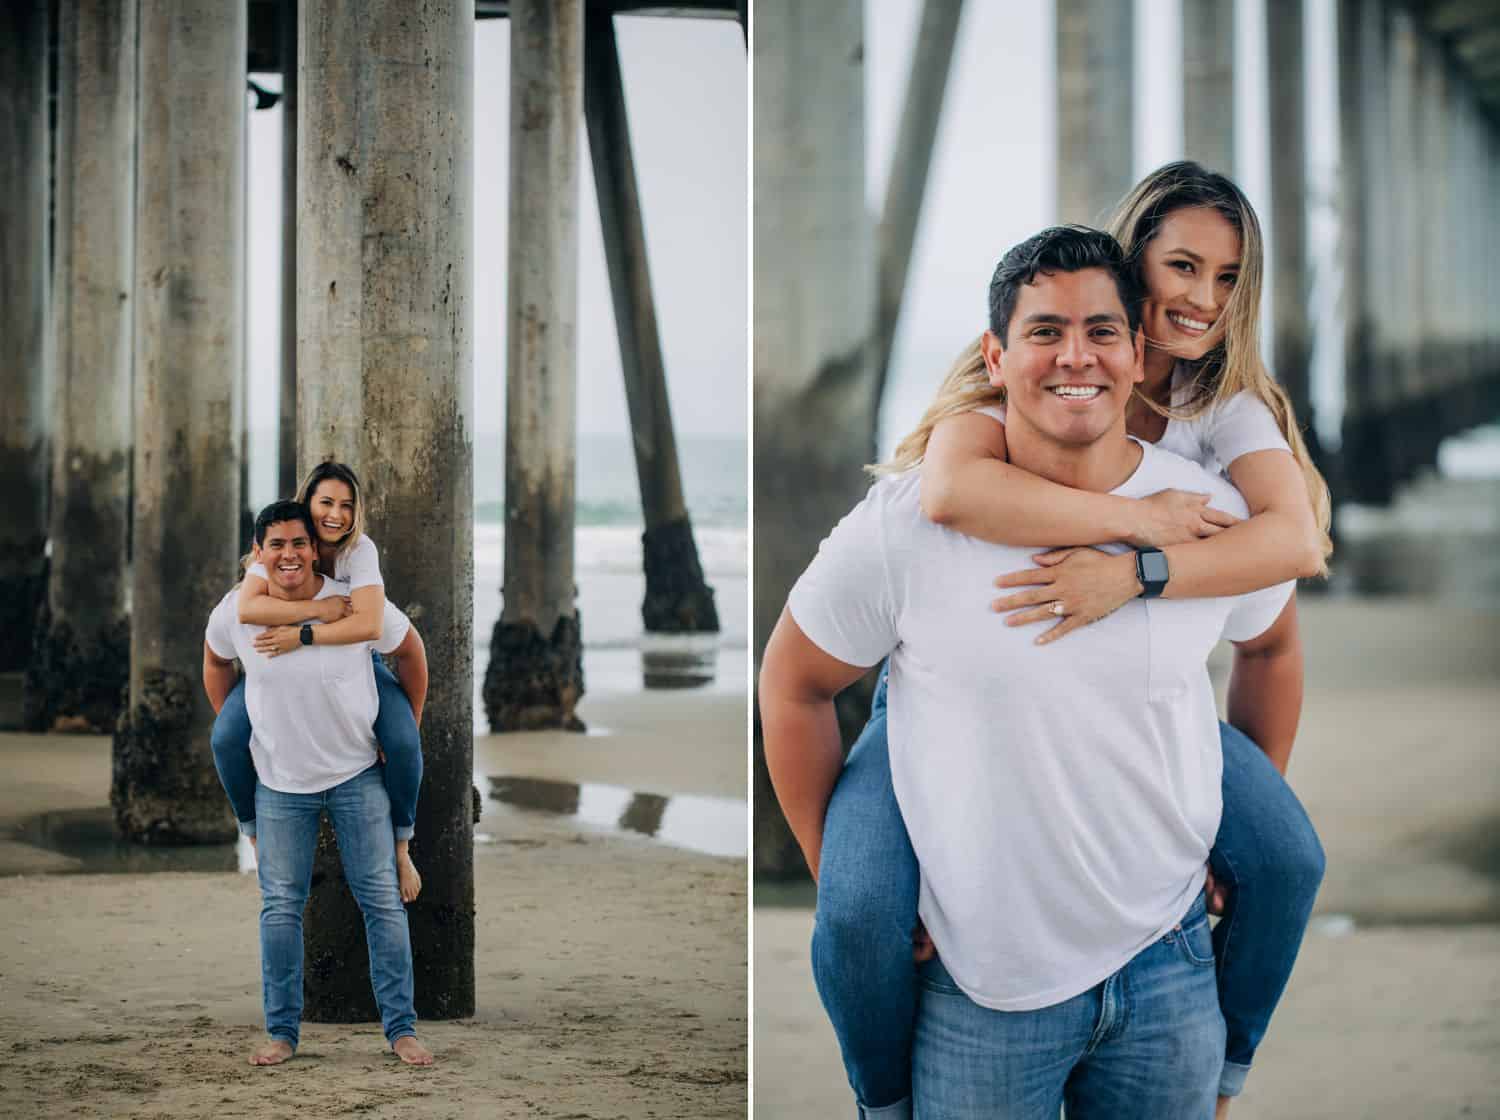
#13: Get Your Clients Moving
Standing still can lead to stiff posing. Invite your clients to walk, leap, dance, or play 1-2-3-Swing! with their little one. Movement inspires easy laughter – even in kids – and can help your clients show off their most natural smiles. It’s also a simple way to enhance flowing hair, billowing blouses, and the kind of natural touch that occurs among people who love one another.
Left Image Settings: EF100mm f/2.8L lens at f/4.5, 1/250″, ISO 100
Right Image Settings: EF24-105mm f/4.0 lens at f/4.5, 1/500″, ISO 100, 93mm focal length
Portrait Posing Tips with Lana Tavares, 222 Photography
#14: People Over Poses
You may not notice it at first, but a lengthy shoot can result in ‘too stiff’ or ‘too scripted’ poses. Remember that your subjects are also humans, so they may feel hungry, tired, or even uncomfortable during the shoot. Encourage them to speak up when they need a break!
The best way to combat exhaustion is to be direct and proactive. Establishing clear communication with your client plays a key role in capturing gorgeous photos. Additionally, compliment your clients as much as you can to boost their confidence!
Don’t get so caught up trying to make the perfect pose that you forget about the people you’re photographing! Photographs are nothing without a story to tell. So tell that story with your unique approach, and have fun!
Conclusion
Posing for pictures isn’t just about plowing through a shot list. The whole session involves managing lighting, camera settings, as well as finding angles that can make clients look and feel great. Be sure to emphasize your client’s best features while also capturing their authentic personality.
Written by ANNE SIMONE | Photographs by LANA TAVARES, 222 PHOTOGRAPHY

Check out these articles, too!

Comments